Inspiration & tips for spring crafting with children
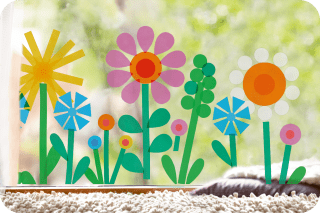
When spring is just around the corner, the first walks in the fresh air are the highlight for little explorers. Nature in particular provides you with the best inspiration for shared crafting sessions. Besides Easter bunnies and chicks, numerous animal, plant, and flower motifs waiting to be crafted by you.
Your children probably have some favorite animals. So always include them in the preparations for your next craft project. That increases anticipation and the fun as well as their self-confidence.
Whether cutting, painting or gluing – your little artists love handling colorful materials. They will hardly be able to wait to discover the beautiful spring motif world to discover. The aim of your shared crafting sessions is always to spark the natural curiosity of your children without overwhelming them.
Therefore, always choose craft instructions according to your children's age, skills and interests. Grab your crafting supplies and get started.
What makes crafting with children in spring so special?
Crafting together with children in spring allows your little ones to learn more about the different seasons and the associated changes in nature.
They consciously engage with flora and fauna. Whether butterflies, bunnies or different species of birds, your children's favorite animals teach them a lot about the big wide world outside their front door. And what could be better than having so much fun while learning?
Besides the learning fun for young and old crafting in spring also increases the anticipation for Easter with children and the summer. At the same time, you are already creatively taking care of the preparations for shared celebrations.
Materials for spring crafting
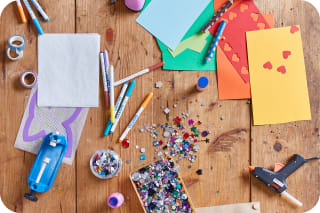
To implement the most beautiful craft ideas for spring to implement together with your children, you need, in addition to a whole lot of fun also various materials and supplies. We have put together an overview for you here. You probably already have some of these at home – so you can get started right away.
Materials for crafting in spring:
Paper, card, cardboard box
paper plates
colored construction paper
translucent paper
felt
egg cartons
needle & thread
craft glue & adhesive or paste
crafting tools
pens & paints
acrylic & watercolor paint
finger paints
brushes
craft scissors
moss
wood
popular seasonal flowers (also in artificial form)
Accessories for spring crafting
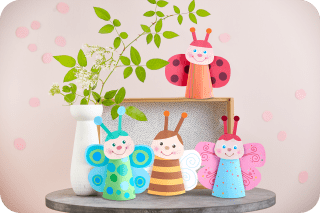
Cute Easter bunnies, beautiful spring branches or colorful Easter eggs – to bring your favorite spring crafts you will of course also need the right materials and supplies.
In the HABA online shop you will find a wide selection of suitable accessories for crafting in spring, to bring your most beautiful ideas to life.
12 craft ideas for spring: Easter bunnies, flowers & more
Whether in kindergarten or elementary school, the crafting in spring with toddlers offers countless creative possibilities. From colorful paper flowers to cheerful animal motifs – the selection is huge! For elementary school children there are exciting projects that are both fun and educational. They can not only train their dexterity, but also learn a lot about nature. So get inspired and discover together with your children the joy of crafting for spring!
Craft spring flowers from various materials
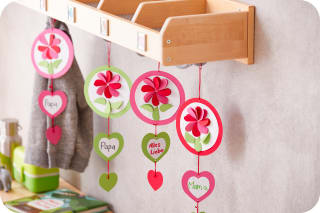
Whether from paper, felt or crepe paper – Flowers can be made from a wide variety of materials. Your creativity knows no bounds. Handmade flowers are also an excellent gift – be it for Mother's Day or Easter.
The best: Handmade flowers last longer than fresh ones and thus prolong the joy! We'll show you many different flower variations and how best to recreate them.
Spring craft idea: Create your own Easter decorations
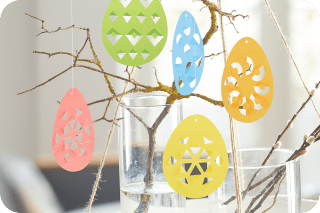
Easter branches, garlands, or homemade bunny cups – the right Easter decoration should definitely not be missing at Easter . The early spring season is perfect for getting creative.
The best part: You can use natural materials to do so. Let nature inspire you and discover the many possibilities of crafting in spring with natural materials. Browse through the different craft ideas, which we have collected for you. Fun is guaranteed!
Discover all Easter craft kits in the shop
Easter bunny crafts for spring: instructions for children
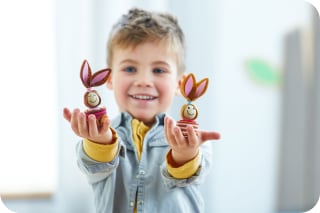
The crafting for Easter is simply part of spring crafting. The cute Easter bunnies are very popular with young crafters. After all, they awaken the curiosity and the anticipation for Easter.
Shorten the waiting time with Easter bunny motifs that you can easily recreate with your children. Whether Easter bunnies made from modeling clay, salt dough, or as cool window decorations, we've put together the best instructions and craft ideas for you: time for the next craft project!
Craft butterflies with transparent paper
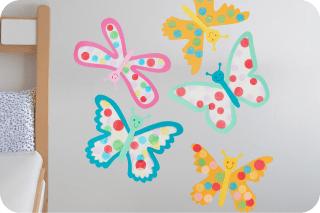
Materials needed:
Pens & paints
Pearl markers
Craft scissors
Craft glue
Sticky tack
Step-by-step instructions:
Glue the transparent paper cutouts onto the butterfly wings and cut them out.
Now color the wings with pens in the colors of your choice. You can also use pearl markers for decorations.
Next is the body. You can decorate it however you like. You can also attach stick-on eyes now in the right place: this gives your butterfly its cheerful face.
Then glue the body along with the antennae to the center of the wings.
Now you just need to decide where your handmade butterflies are allowed to fly. To attach them, use some sticky tack.
And your butterflies are ready.
Want to make even more great window pictures for spring? In our shop you'll find a wide selection of window-picture sets to create beautiful window decorations to craft.
Animal designs from toilet paper rolls
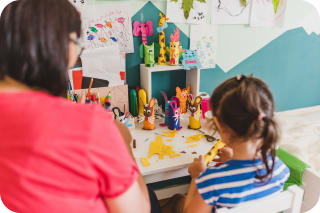
Materials needed:
empty toilet paper rolls
construction paper in the colors of the respective animal
googly eyes
craft scissors
craft glue
Step-by-step instructions:
First, cut a strip of construction paper in the color of your animal so that it matches the height of the toilet paper roll and wraps around the entire roll.
Now glue the construction paper to the toilet paper roll. Spread glue over the entire strip of construction paper so that every corner is covered. Then wrap the strip around the roll and press it firmly.
Now for the details: whether ears, noses, whiskers or little feet – draw all the details needed for your design on construction paper in the appropriate colors, then cut them out.
Tip: To get the right sizes, you can always hold the drawings briefly next to the toilet paper roll. This ensures the proportions are correct.
Once you've cut out the pieces, glue them onto the correct spots of your toilet-paper animal until it gradually takes shape.
Finally place the googly eyes and draw a mouth on your little animal: that gives it its adorable face.
And your toilet-paper-roll animal is finished!
Make Mother's Day gifts

Materials needed:
paper, cardboard, cardboard box
construction paper
pens & paints
decoration & embellishment materials
gift ribbon & bows
craft scissors
craft glue
Step-by-step instructions:
Whether homemade cards, gift boxes or other artworks, on Mother's Day handmade = lots of heart & love. Cards, letters and pictures with hearts or even in the shape of a heart are the most popular gifts for all moms. For this, take white or colored paper – however you like.
Fold the paper in half so that it becomes a card.
Then let your creativity run free. You can cut hearts out of construction paper and place them on the front of your card or draw the hearts with different pens.
Write a few nice words inside your Mother's Day card that any mom will surely be happy about. Children who cannot write yet will of course need support here or can draw a small picture.
Lastly the card can be decorated with a gift ribbon. However, that's not a must.
And your very own Mother's Day gift is finished.
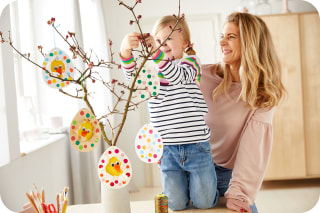
Spring crafting with natural materials: Decorating spring branches
Materials needed:
branches (bought, but feel free to collect branches yourself on walks)
vase or glass container
construction paper
plastic eggs
pens & paints
colorful cords
craft scissors
craft glue
hot glue gun
carving knife
gloves
Step-by-step instructions:
First of all, tie together all the branches you want to use at the lower ends and place them in a vase. Alternatively, you can buy a thicker branch with several offshoots or collect them on a walk in the woods with your children.
Then it's time to make the decorations you want to hang on your spring branch. Spring and Easter motifs such as Easter eggs, bunnies, butterflies, etc. are especially suitable. To do this, sketch the motifs on construction paper and cut them out. On additional colors of construction paper you can paint details and cut them out to complete the motifs. For example, you can cut out the basic shapes of butterfly wings and the details like antennae and then glue them together. Or you can choose a complete craft kit to decorate your branches. In our shop you'll find a Easter egg craft kit, which your kids can start using straight away.
You can also paint plastic eggs with acrylic or permanent markers. This can produce the most colorful Easter eggs.
For all homemade creations, motifs, or Easter eggs that should decorate your spring branch, attach a colorful cord that you knot at the ends. If there are no holes, simply make them with a needle.
Your spring branch ornaments are finished; now you just need to place them on any branches.
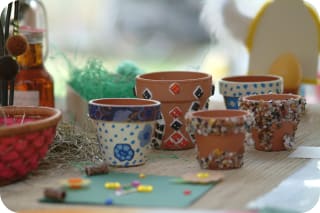
Painting flower pots
Materials needed:
terracotta pot
acrylic paint or varnish in pastel tones & white
paintbrushes
paint markers
super glue
wire
jewelry pliers & tweezers
plant of choice (also artificial)
Step-by-step instructions:
Before you start painting your flower pot, choose the motifs you want to paint. You can paint pots a single color with colorful details, two-tone, or get creative by gluing on various stones, shells or other materials.
Then you can really get started: take a flower pot of your choice and clean it thoroughly. Acrylic paint only adheres permanently to smooth, clean surfaces.
If you have a specific motif in mind, sketch it on the pot with a pencil first. This ensures that all colors end up in the right place.
Now paint the flower pot with your favorite acrylic color uniformly or only in selected areas. Apply the paint to the entire outer side all around. If you like and the pot will be hung later, it is also recommended to paint the lower and upper parts of the inside.
Let the paint dry well. Only then move on to the details.
With a thin brush or paint markers, paint all the details on the pot. From dots to stripes or animal motifs, anything goes. There are no limits to your creativity here.
If you don't want to paint, decorate pots with small colorful stones or materials made of other fabrics. For that you'll only need a bit of super glue.
Your colorful flower pot is done! The perfect decoration for spring.
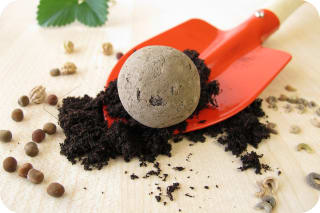
Make your own seed bombs
Materials needed:
five handfuls of clay powder
five handfuls of soil (regular potting soil, can be mixed with compost)
one handful of seeds (lavender, cornflowers, marigolds or herb & vegetable varieties)
water
sieve
bowl
Tip: For one square meter you need about ten seed bombs
Step-by-step instructions:
Take a bowl and sieve the soil very finely into it.
Now add the seeds and the clay powder to the bowl and mix everything together.
Carefully add water drop by drop. Knead the mixture until a consistent dough forms.
Now shape the seed bombs. Take a walnut-sized amount of the mixture and form it into balls.
Let the seed bombs dry for about two days in a place that is not too warm and well ventilated. You can also bake the balls in the oven at a low temperature (below 50 degrees Celsius).
After baking or the two-day waiting period you can throw the seed bombs into your garden and wait for the seedlings to begin to grow. The seed bombs are also great as gifts for friends or for Mother's Day.
Building insect hotels: Spring craft for nature lovers
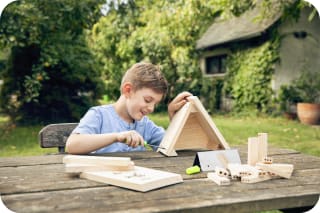
A homemade insect hotel can be the perfect alternative to colorful spring crafts if you have children at home who enjoy exploring the animal and plant world. Building an insect hotel is not only a lot of fun, but is also good for the environment. In our shop you'll find a kit for an insect hotel that your explorers can start using right away.
Not to forget: the pride of little makers over the great result that can move into your garden. They will hardly be able to stop beaming with pride. Besides thefine motor skills this also develops practical skills and self-confidence.
The best part: you provide small insects with more habitat and protected nesting opportunities. What to consider when building an insect hotel and how best to proceed, we have compiled for you on the insect hotels page.
Creative ideas with finger paints
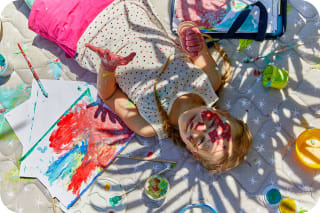
Children love to squish and play with colors. With finger paints, the wildest creations can be made and not just on paper. Whether children's clothing or other textiles, your little artists will brighten every old and new piece of fabric with a burst of colorful paints.
Besides a big portion of fun, you'll also need not too many materials. On the page all about finger painting, we have put together a selection of simple and colorful craft ideas for finger-paint creations. Get inspired and start right away!
Spring crafting with wool: Crocheted little bees
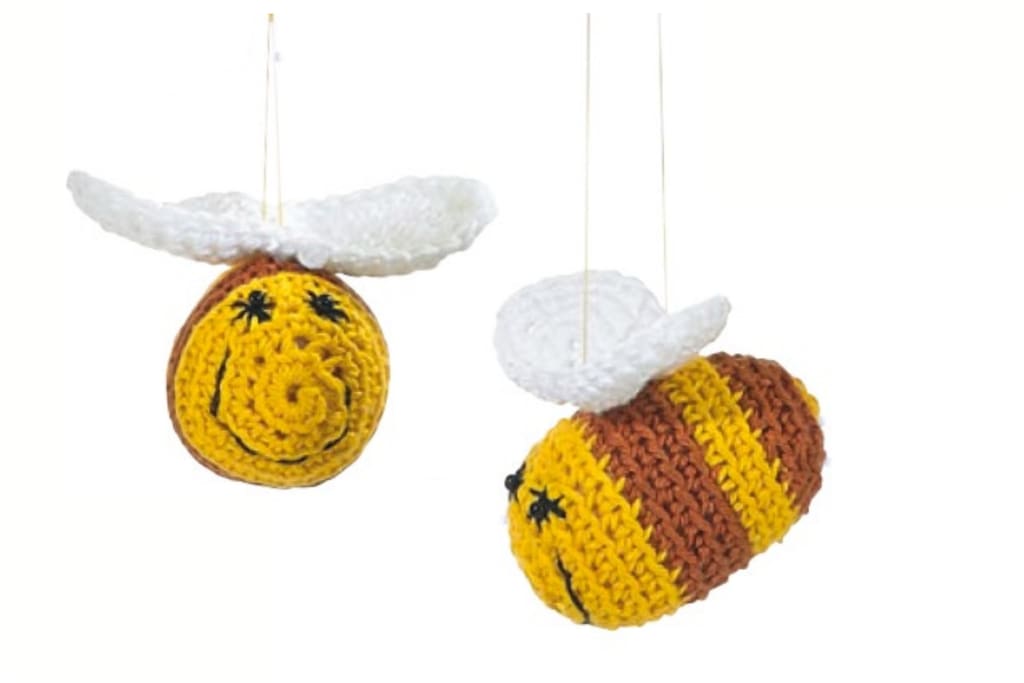
Materials needed:
Cotton yarn
Craft stuffing (wadding)
Pins
Crochet hook
Scissors
Embroidery needle
Step-by-step instructions:
Foundation: crochet 1 ch and 12 sc into a magic ring, close the round with 1 sl st into the ch
Round 1: increase in every 2nd stitch = 18 sts
Round 2: increase in every 3rd stitch = 24 sts
Rounds 3 - 14: sc
Now stuff with stuffing.
Round 15: crochet every 5th and 6th stitch together = 20 sts
Round 16: crochet every 4th and 5th stitch together = 16 sts
Add more stuffing.
Round 17: crochet every 3rd and 4th stitch together = 12 sts
Round 18: crochet 2 stitches together each time = 6 sts
Pull the yarn through the six stitches and sew closed crosswise.
Begin each round with 1 ch and close with 1 sl st into that ch. This joining stitch is not counted! Crochet the 1st single crochet of each round into the first visible stitch loop.
Colors:
Crochet 5 rounds in yellow, then alternate 3 rounds in brown and 2 in yellow.
Embroider eyes and mouth with black yarn.
Wings:
Starting chain: 16 ch
Round 1: sc around the chain, in the first and last stitch of the chain make 3 sc each.
Crochet 3 more rounds of sc and increase 3 sts at the same spots as in the previous round. Close the rounds with a sl st into the ch.
Tie the center of the wings with yarn and sew onto the bee's back. Attach a loop for hanging.
Frequently asked questions about crafting with children in spring
From what age are children ready to do crafts in spring?
In which months should we start crafting spring decorations?
Which objects can toddlers already craft independently in spring?
More articles about leisure & creativity


Image credits:
Woman crafting with child at table © very_ulissa - stock.adobe.com
Boy gives his mother tulips © JenkoAtaman- stock.adobe.com
Painted flower pots © foto.fritz - stock.adobe.com
Seed ball © Heike Rau - stock.adobe.com