Types of kites – models and variants at a glance

In autumn, ideal wind conditions prevail, to fly a kite with your children on the meadow. Even at wind force 3 (12-19 km/h) the fun can begin. Whether a homemade kite or a purchased model – the autumn play outdoors is fun for all children and probably also evokes childhood feelings in parents when the kite soars into the air.
We'll show you the different types of kites and the special features of each model.
Single-line kites
Among classic flying kites is the single-line kite. As the name suggests, this has only one line and is ideal if your child does not yet have much experience flying kites.
Steerable kites
Traditional steerable kites have two control lines, with which experienced kite flyers take control. The frame usually consists of shatterproof fiberglass and carbon fiber spars and withstands crashes and hard landings well.
Steerable parafoil kites
Similar flying acrobats to steerable kites are steerable parafoil kites. These also have two lines, but no frame. The frameless kites are ideal for beginners and are easy to fly.
Initially it's best to choose a small model without much pull so your children can control the kite on their own.
Which kite suits my child?So that the fun remains the focus when flying kites, when buying or crafting pay attention to an age-appropriate model. This way you avoid frustrations and your child can later control the kite independently.
Younger children should never play with a kite alone.In the heat of the moment the kite string can quickly wrap around the neck and there is a risk of strangulation. For this reason always keep a watchful eye on your children and help the little hobby pilots with steering.
Single-line kites are already suitable for children aged three and up. Even in light wind they rise into the air and are, thanks to the single kite string, easy to hold and to guide.Unlike steerable kites, single-line kites cannot be steered as precisely – but especially younger children cope better with a single kite line. Here the fun is the priority and your child has the opportunity to steer alone.
Entry-level models come in many different shapes, colors and variants – from a funny clown face to printed themed kites to colorful rainbow kites, there is a lovely favorite model for every child. Further down on this page you will also find instructions for crafting the beginner model.
Steerable kites are suitable for children aged eight and up who are more practiced and have mastered kite flying safely. If your child is a bit older and already has the knack, they can fly maneuvers with a steerable kite and control it independently.
Good to know: The more control lines a kite has, the faster, but also the less controllable it flies. Therefore always pay attention to the pull force of the kite and decide together whether your child is ready for this model.
Well prepared, nothing stands in the way of a lovely afternoon with your kite and exciting active games outdoors.
Flight and wind kites
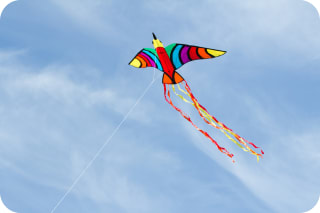
Making kites with children – materials you need
Tissue paper or tracing paper
Crepe paper
two round dowels with 4 mm diameter (one 60 cm and one 44 cm long)
Kite string (5 m long)
Control line with handle
Natural fiber tape, optionally kite cross
Key ring
Folding rule
Pencil
Glue
Adhesive tape
Ruler/Set square
Scissors
Needle
Small saw
Instructions for making a kite: How to successfully build a flying kite
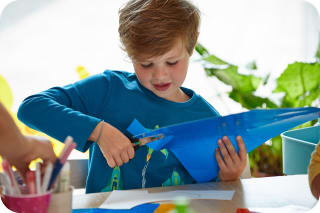
What could be nicer in autumn than flying a homemade, colorful kite? To put your plan into action right away, we show you below how to make a classic kite with a stretched sail on a wooden frame.
Crafting instructions: How to build a flyable kite
Making a kite is not difficult at all – if you follow these instructions you'll soon be holding your very own flying device. The advantage of crafting: your children can design their kite exactly how they want it: colorful or single-colored, with a face or without, with a name and pattern or very plain. Just grab the pens and tools and let the big crafting fun begin.
Step 1 - Preparation

Check whether you have gathered all the materials and tools listed above and lay them out. It's best to craft your kite on a large table.
Use a protective covering so you don't damage the surface. Now you can get started.
Step 2 – Measuring the wooden frame
Spread the tracing paper out in front of you and take the ruler. Draw a longitudinal line of 60 cm in the middle of the paper. Using the set square, measure at a height of about 48 cm a right angle of 90 degrees to draw the cross line.
At this point draw a line 44 cm long on the paper. The kite frame will later be placed on the drawn cross.
Step 3 – Cut out the kite shape
Now connect the endpoints of the drawn lines – the kite shape will become visible on the paper. Carefully cut it out with scissors. For younger children, mom or dad should help so that the kite later has straight edges.
Step 4 – Determine attachment points for the kite string
Carefully pierce two balance points in the kite with the needle. These will indicate later where the kite string is attached. The first point is located exactly in the middle of the cross, the second about 4.5 cm from the lower tip of the longitudinal line.
Step 5 – Cut and insert the wooden rods
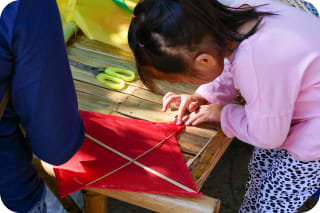
Now it's time to build the kite frame. If the rods are not yet the right length, shorten them with the craft saw to 60 cm and 44 cm respectively and file the corners if necessary to avoid wood splinters.
To ensure the frame holds securely, bind it with natural fiber tape, by wrapping it crosswise around the kite frame and knotting it. If you have a kite cross at hand, insert the rods into the cross – in this case halve the rods in the middle and insert them under tension into the four openings.
Step 6 – Covering the wooden frame
If the kite frame is stable enough, lay it on your cut-out kite and poke two holes on each side next to the rods into the outer corners with the needle. It's best to use adhesive tape to reinforce the tracing paper so that the holes don't tear later. Now thread the natural fiber tape through the holes and tie the frame to the sail with the string – your kite is now fully covered.
Step 7 – Attach the kite string
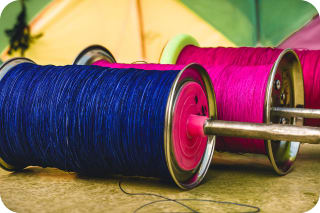
Now it's already time to attach the kite string. This is tied below the rod cross to the longitudinal rod. After you have tied several firm knots, thread the kite string through the upper cross hole, which you made in step 4 of these instructions, to the front. Also attach a string to the lower balance point hole of the long rod. Once the knot is tight, also lead this string through the hole to the front side of the kite.
Turn the kite over and pull the upper string along the cross spar to the left corner and the lower string along the diagonal edge to the left corner so that they approximately follow the shape of the kite. Knot both strings together so that a loop is formed. Any excess strings are simply cut off.
Step 8 – Attach the control line
This crafting step is easiest with a Key ring .bowline knot to the key ring. It's very easy to do: pull the loop of the kite string through the key ring and then push the loop over the ring and through until the end of the string. Now tie the control line of your kite securely to the key ring as well.
Step 9 – Make a kite tail
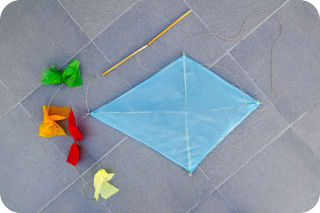
To make your kite fly, it still needs a colorful kite tail as a counterweightStep 10 – Final construction steps
You're almost there. Before you conquer the next meadow with your homemade kite, check that everything is securely attached and properly adjusted.
Hold the kite by the key ring so that the bottom tip touches the ground. Does the longitudinal rod now form an angle of between 15 and 25 degrees to the ground? Perfect, your kite is ready for takeoff. Otherwise, tighten the strings a little until the kite is at the correct angle.
Firmly glued: craft glue for building the kite
So that your homemade kite can withstand even very strong winds without any problems, use a good craft glue for construction.
Safety tips for kite flying
After making the kite, your children will want nothing more than to finally fly it together with you. Before the fun begins, here are some safety tips for
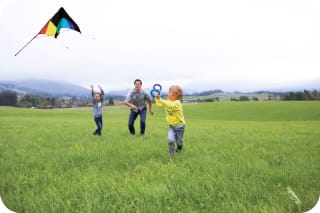
untroubled fun while kite flyingChoosing the right locationMake sure that the field or meadow is large enough so that your children can run around freely and without worry. There must be no high-voltage lines, pylons, dangerous roads or railway tracks nearby. It is also forbidden to fly kites near airports.
Protect hands
The kite string can injure small children's hands while steering. It is best that your children wear light gloves so the string does not cut into the skin.
Pay attention to the weather
If a thunderstorm approaches, bring the kite in immediately. Never fly a kite during a thunderstorm; there is a danger to life!
Keep enough distance
If there are other people or animals on the meadow, keep a sufficient distance to avoid injuring anyone.
Take the correct position to the wind
It is best to stand with your back to the wind and let the kite start from the air. Hold it flat on the ground and point the top tip into the wind: now your child can run and pull the kite up.
Richtige Position zum Wind einnehmen
Stellt euch am besten mit dem Rücken zum Wind und lasst den Drachen aus der Luft starten. Haltet ihn flach am Boden und richtet die obere Spitze gegen den Wind: Nun kann euer Kind losrennen und den Drachen nach oben ziehen.
Frequently asked questions about crafting kites
From what age can children make a kite?
How difficult is it to build a flight-worthy kite?
Where do dragons actually come from?











Image credits:
Child holding a kite in the air© DREAM INSPIRATION - stock.adobe.com
Many kites in the sky © NikonArt - stock.adobe.com
Father and son with a kite in a field © JenkoAtaman - stock.adobe.com
Accessories for kite making © Racle Fotodesign - stock.adobe.com
Child inserts wooden cross into kite © rattik - stock.adobe.com
Colorful kite string © abhishek - stock.adobe.com
Blue kite lying on the ground © lunamarina - stock.adobe.com