Inspiration & tips for crafting gifts
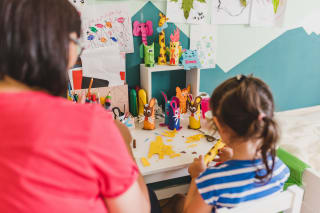
There are numerous ways to bring joy to others and to gift them with plenty of love in the form of special presents.Whether as cards or in elaborate craft projects – Gifts show your loved ones that you are thinking of them, that you love them and want to do something nice for them. Basically, attentions – small or large – can be given at any time. You don't need a specific occasion for that, even though you will probably associate gifts with Christmas, Easter and birthdays.
What matters above all: your gifts should come from the heart and suit the person receiving them. There are various kinds of gifts you can create. For example,Cash gifts as a great way to financially support the recipient in one of their projects or wishes. Banknotes can be folded into special motifs (butterflies, hearts, etc.) and glued to a card.
Also gift vouchers are popular gifts. They can be easily personalized with construction paper and pens so you don't have to buy them pre-made. Keepsakes given as gifts are especially valuable.Whether picture frames, garlands with photos as beautiful decor, or great pocket photo albums for on the go – Memories bind people together and provide topics for conversation and nostalgia, both for the person receiving the gift and for the little crafters.
Personalized gifts are also individual and interesting. Keyrings with inscriptions or jars with labels that suit the recipient are always well received. In addition, any form ofdecor as a very creative and versatile gift option. From painted stones and beaded jewelry to seasonally adapted decorations likeChristmas decorations, Spring decorationsor craft ideas for children's birthday parties – this kind of gift is often used multiple times and regularly, which is why it proves particularly useful.
If your toddlers and older offspring like to paint and draw, self-painted pictures are exactly the right gift ideas for you. But homemade baked goods are also always well received – as they say, love goes through the stomach. Basically, make sure that youchoose ideas, craft instructions, and recipes appropriate to your children's ages select. While older little crafters usually look for bigger challenges, toddlers often still require support. In addition, craft projects should be completed insmall steps to be completed. The attention span of the youngest is not yet fully developed, so small steps lead to big successes.
The most important thing: Your crafting fun always comes first! Following this motto, even initially imperfect crafts become perfect gifts.
Buying gifts vs. crafting gifts
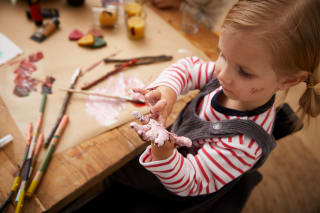
Gifts hold a special place in most families. It doesn't always have to be something bought, because handmade gifts from the heart are usually best received by grandparents, parents, and friends.
It's not a problem if one or another craft project doesn't turn out as planned. Especially the imperfect and the time spent give the gift a special character, which makes it unbeatable: The emotional value of homemade presents is incomparable to any other.
Of course, bought gifts can also be of special value. Especially if they have already been on the wish list for years or if it's essentially an absolute heart's desire. But always first consider whether you might prefer to make a handmade alternative. In either case it is clear: your loved ones will surely be happy about anything you give them with great affection and lots of love!
Promoting children's development with handmade gifts
Most children get enormous joy from giving something and surprising someone in the family or friends. This teaches them, on the one hand, love for others and, on the other hand, empathy. Even at an early age, giving can be conveyed to toddlers as a fulfilling and a special way of caring be conveyed.
Besides these social skills, the crafting process itself is also an educational activity that is especially beneficial for the physical development of little crafters. In Crafting with toddlers, but also during craft projects with older kids the fine motor skills are promoted and the dexterity is trained. Your little ones learn to organize and bring their fantasies and creative ideas to life.
Furthermore, your kids gain a a healthy dose of self-confidence added when they first realize what their hands have created and that their artworks are well received by the recipients.
These materials you need to craft gifts
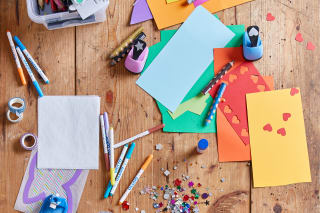
To get started right away and put the best gift ideas into practice, you only need the right craft materials. Basically, in addition to classic materials like paper, felt and craft cardboard, you can also many everyday items to use for crafting gifts. Your creativity is boundless.
To get an initial overview of which craft materials you still need to buy before your craft sessions or just need to fetch from your stash, HABA has put together a list for you here.
Basic equipment:
plain paper
cardboard, card stock
needle & thread
yarn
salt dough
finger paints
brushes
Natural materials:
moss
pine cones
acorns
chestnuts
nut shells
wood & twigs
flowers (depending on the season) & leaves
stones
Upcycling: Don't throw away:
paper plates/cardboard rolls
egg cartons
kitchen & toilet paper rolls
bottle caps & champagne or wine corks
mason jars/screw-top jars
bubble wrap
empty yogurt cups
Making gifts with children: creative craft ideas & instructions
Now you probably want to start with your craft ideas right away and make wonderful DIY gifts. Your wish is our command and so you will find great and special craft instructions for toddlers and older kids.
Whether decorations, creative coloring pages or individually designed little niceties that will be used in everyday life – with the following craft ideas you will create huge joy for your gifted family members and loved ones bring. Also feel free to be inspired to create your own. The more individual your gifts, the greater the excitement for your handmade presents.
Making gifts with toddlers
Designing coloring pages
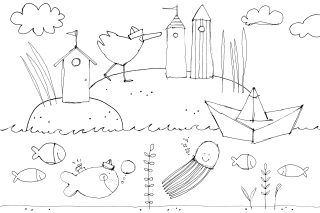
Required materials:
Coloring page (printed or pre-drawn)
How to do it:
First, download the coloring page using the button below the instructions and print it out.Tip:Alternatively, as parents you can draw a template for your kids. Maybe your children even want to get involved themselves and independently create a coloring page. That makes it even more unique.
Now you can get creative right away. Grab pens and paints of your choice and color the individual areas so that, little by little, a beautiful piece of art emerges.
If you want to further embellish your coloring page, you can do so with glitter, small stickers or other little details that you draw yourself. Let your creativity run wild. The more individual your coloring page, the greater the joy for the recipients.
Another idea: If you want to decorate gift cards, coloring pages are a perfect addition. For example, you can stick the cut-out coloring page onto your homemade Easter cards, Christmas cards or birthday cards.
Decorate gift cards with playful paper snips
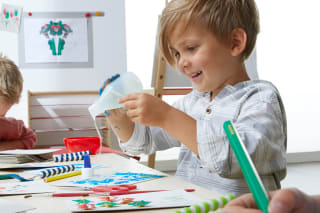
Required materials:
Cardstock in various colors
Embellishment & decoration materials
How to do it:
First, cut your cards out of the cardstock in the color of your choice.
Now the snipping begins. Give your toddlers colored construction paper and let them happily tear off small paper snippets. Under supervision, the craft scissors may of course be used. This is especially fun for little crafters who have just learned to use scissors.
Spread glue on the front of your pre-made gift card. Your children then take their paper snippets and stick them onto the card as they please. Gradually a colorful picture emerges and thus a truly individual gift card that will surely delight your loved ones. Tip:Before gluing, you can also draw specific motifs on the card. Then only these will be covered with snippets afterwards.
You can further embellish the gift cards with various embellishment and decoration materials. Just get creative.
But you're not finished yet. To bring even more joy to the recipients, a few loving words are still missing. It's best to write these together and then write them down for your kids. Alternatively, you can also download our template, cut out individual areas and glue them into the inside of the card, then write on the lines.
And there you have your very own personalized gift cards with playful paper snips.
Personalized keychains
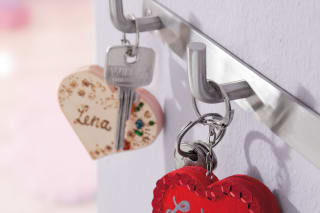
Required materials:
if applicable, pyrography pen
Paintbrush
How to do it:
Our Sachenmacher craft kit contains ten plywood cutouts with key rings that are just waiting to be decorated by you. Gather initial ideas and then you can get started.
Decorate the hearts as you wish. Whether with acrylic paints, colored or felt-tip pens, stickers or other embellishment and decoration materials – you can turn the keychains into real works of art in many ways. Tip: With parental support, individual motifs and inscriptions can also be burned into the wood with a pyrography pen into the wood. Your toddlers can indicate what should be on it and possibly draw it themselves. You then take over the part with the pyrography pen.
Once your wooden cutouts are well dried, cooled and ready for use, attach them to the key rings.
And your keychains are ready to be given as gifts.
Making gifts with older kids
Salt dough handprints
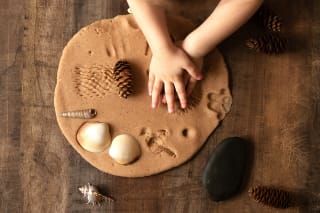
Required materials & ingredients:
For the salt dough:
2 cups flour (500 g)
1 cup water (250 ml)
1 cup salt (250 g)
50 g cornstarch
some oil
For crafting:
Needle
Twine
Paintbrush
Rolling pin
Plate (slightly larger than your hands)
How to do it:
Put all the ingredients into a bowl and mix them into a dough. You can use a hand mixer or your hands. Once everything is well combined, you should have a smooth, well-formable salt dough. Note: The cornstarch ensures that your salt dough does not become crumbly and holds together well – even when baked in the oven. Tip:If the dough is too wet, it's best to add a little more flour. If it's too dry, add a little water. Do this until you achieve the desired result. To make the salt dough even more supple, add one to three tablespoons of oil. For increased durability, you may add one to two tablespoons of wallpaper paste. Oil and wallpaper paste are not absolutely necessary if you prefer to omit them.
Then roll out your salt dough with a rolling pin.
To get a perfect circle, you can use a plate as a template. It should be slightly larger than your children's hand so that the handprint fits perfectly on the round salt dough shape. Place the plate on the salt dough and trim off the excess edges along the plate.
Now your children can place their hands on the salt dough and press down firmly to create a nice imprint. Toddlers may need a bit of help here. Make sure all the little fingers are nicely outstretched.
After making the imprint, use a needle to poke a hole in the dough in the middle and above the handprint. Twist the needle several times to enlarge the hole. You will later thread the twine through this. This way your gift can be hung. Tip: If you have some dough left over, you can make beautiful salt dough ornaments from it. These are perfect as Christmas tree decorations and, of course, as additional gifts.
Then dry your salt dough handprints in the oven for about two hours at 50 degrees and another two hours at 100 degrees. Alternatively, you can let them dry without heat. However, that can take a few days.
Once your imprints are dry, it's time for color: Paint your handprints in the shades of your choice. You can also draw additional small motifs. There are no limits to your creativity.
Let the imprints dry well again before threading the twine through the previously made hole using a needle. Knot both ends together and you're done.
Painting dishes
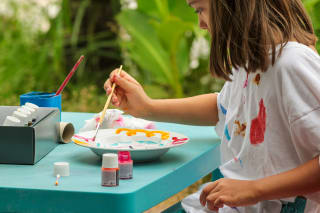
Required materials:
Dishes (plates, cups, etc.) that you want to decorate
Paintbrush
Old newspaper or another painting surface
How to do it:
First, cover your workspace with old newspaper or another painting surface.
Wash the dishes you want to decorate and dry them thoroughly afterwards.
Now you can get started: think about how you want to paint the plates, glasses, cups, etc.
Once you have collected initial ideas, choose either acrylic paint or porcelain markers to put your ideas into practice. Whether animal motifs, loving words or exciting patterns and shapes – everything is allowed.
When you are finished painting, let the paint dry thoroughly. If you painted the dishes with porcelain colors, you can make them permanent in the oven. Bake them at about 160 degrees for 25 to 30 minutes. After that the paint is baked in and your dishes are dishwasher-safe. Dishes painted with acrylic paint are more suitable as decoration, as the paint fades too quickly when washed.
And your self-painted dishes are ready and just waiting to be gifted.
Decorate tealight holders
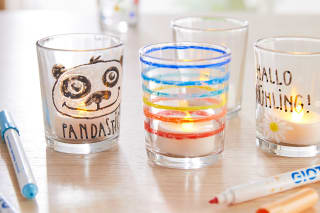
Materials needed:
Jars (mason or jam jars)
Paintbrushes
How to:
First, rinse your jars thoroughly. This ensures they are completely clean and ready to use. Dry your jars well and check one last time that you have removed any residue and stains.
Now decide how you want to design your tealight holders. Should there be specific motifs, glued-on stones, or just painted details — the choice is yours.
Painting beautiful patterns and motifs is very popular. For this, use glass paint pens or acrylic paint in the colors of your choice. For example, paint offset horizontal lines around the entire jar to create a kind of rainbow. You can also write sweet messages on the tealight jars or paint one of your favorite animals. Feel free to get creative.
With decorative and embellishment materials you can bring out something extra special from the jars. Acrylic mosaic stones, in particular, are a wonderful option for a custom-designed jar. We have provided a matching tutorial for you under this craft guide.
Finally, let your tealight jars dry thoroughly. Then you can insert a tealight and your gift is ready.
Frequently asked questions about crafting gifts with children
How much time should we spend crafting gifts?
Which gift ideas can toddlers already do on their own?
What makes a good gift?
To the latest articles from this topic area



Image credits
Child crafting together with grandmother © very_ulissa - stock.adobe.com
Children's hands pressing shapes into salt dough © Татьяна Романова - stock.adobe.com
Girl painting a plate © Eléonore H - stock.adobe.com
Little boy cutting and gluing with yellow felt © cicisbeo - stock.adobe.com