What is felting? – Which crafts you can make with children
Felting is an ancient form of handicraft, in which individual wool fibers, through repeated working of the untreated wool, bind together into a dense fabric. The fibers shrink and increasingly entangle through rubbing against each other.
In this way you can create large layers of felt "fabric" that can be further processed into bags or hats. But you can also shape small figures or felt different-colored wool into colorful balls. There are countless ways to get creative.
Whether keychains, decorations (especially for Christmas or Easter), or great felt pictures – you have plenty of choices for what to felt next.
Basically, felting distinguishes between two techniques: Wet felting and needle felting (also called needle felting). While wet felting requires water and soap, needle felting needs special felting needles with a small barb. However, for both methods you only need a few materials, so you can get started right away and create great works of art.
Felting – the story behind the ancient craft technique
The oldest preserved felt garments date from around 1800 BC.Archaeological finds indicate that felting techniques were already used in the Neolithic. Felting has long been widespread among the mountain peoples of China, but felt caps from the period were also found in Denmark and northern Germany around 1500 BC. were found. Today felting is again completely on trend, whether for slippers, individual hats, or children's toys.
Felting promotes child development
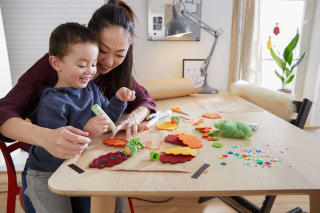
Felting is not only great fun, it also promotes your children's development – so it's a double win. Through intensive engagement with felting wool, your little ones learn the characteristics of different materials and how to distinguish them. The colorful hues and the felting of individual fibers stimulate the imagination and your children enjoy making their own individual felt creations.
Not least, this amazes them – once your kids understand what they've created with their own little fingers, they brim with pride. Toddlers in particular can be enthusiastic about felting. They still need help, but it becomes apparent early on that their ability to concentrate improves and they develop interest in their own projects.
In general, felting also promotes your children's fine motor skills and their sensory perception of your children. The craft becomes a meditative experience that allows your little ones to calmly explore their own abilities and to perceive developments completely stress-free. This strengthens self-confidence and self-assurance.
Above all, one thing is at the forefront: the time spent together as a family. What could be nicer than being together and making beautiful creations?
Which wool is suitable for felting with children?
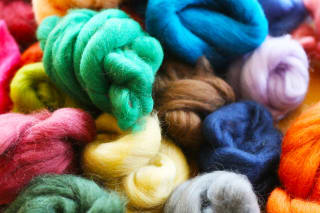
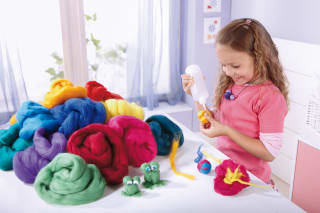
You only need a few materials for felting with children. For all felting methods: The wool is the most important item, to start your felt creations. However, the question arises: which wool is best for felting? Basically, any natural wool is suitable for handicrafts. Sheep's wool is one of the most popular materials for felting. But luxury yarns like alpaca, mohair, or angora also work easily for felting your craft ideas.
It's especially important to pay attention to the texture and manufacturing process. For your wool to felt well, it should be pure wool . Chemical-treated wool and especially synthetic materials like polyester, polyamide, or acrylic, as well as plant fibers like linen, flax, cotton, and viscose, are not suitable for your craft sessions because they are difficult to work with.
Also, the label on the wool should not say "superwash" or "guaranteed felt-free". Because then the wool is free of felting fibers that you need for your felting projects. For beginners, carded wool works very well, as it felts quickly and easily. Next is sheep's wool (virgin wool), which is characterized by its uncombed fibers and thus creates even more effective felt figures.
If you choose yarn, make sure it has a high wool content. If this is 70 to 100 percent, you can use your chosen luxury yarn without problems. For needle felting, the so-called 'fairy wool' is suitable. This is wool made from plant-dyed combed tops. The fairy wool was heated to the boiling point twice, which is why it is already partially felted.
What to watch out for when felting with children
To make felting with your children a real success, a few basic safety measures, preparations, and tips are helpful. Here HABA has compiled the most important points for you:
Prepare your craft workspace so it is protected from (paint) stains and other accidents: lay a waterproof painting mat or plastic tablecloth on your table. For wet felting, it's also worth having towels ready and placing them on the work surface if necessary.
Use warm water for wet felting: ensure you provide warm but not too hot water. With lukewarm water the felting process takes a little longer than with heated water – but this way you make sure your children don't burn their little fingers. If you heat the soapy solution to the usually recommended 50 degrees, then you as parents should take over the task of dipping the wool.
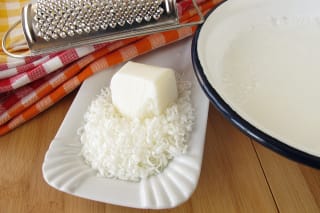
Soapy water is necessary for wet felting: the soap and the rubbing of the wool are the secret to felting. Only then do the wool fibers entangle, the wool shrinks, and a firm textile structure is formed.
Your soap should be gentle on the skin and re-fatting: avoid ordinary soaps and dishwashing liquids, as they are often enriched with chemicals that make felting more difficult. Prepare your soapy water preferably with olive oil soap or sheep's milk soap. Do this by grating the soap and adding it to the water. These soaps are especially skin-friendly and therefore suitable for felting with children.
Use only high-quality felting wool: colorful carded wool is best for first felting projects. Chemically treated wool is unsuitable because it is hard to work with. Also, there should be no "superwash", i.e., a felting protection, present.
Do not leave your children unsupervised: especially toddlers should not felt without parental support. For wet felting this is mainly due to the warm water, and for needle felting due to the very sharp felting needles.
Let's go: correctly applying felting techniques
Now you probably want to get started right away and tackle great felt crafts. What are you waiting for? Grab your materials and begin. To get a feel for felting, especially as beginners you should start with small ideas. This way you learn the techniques step by step and can then decide which method suits you best.
Therefore, in the following we have simple instructions listed that let you try both wet felting and needle felting. Have fun!
Wet felting with children: making felt balls
You will need the following materials:
Plastic tablecloth or baking sheets as a surface & drip area
Bowl with warm water
solid or liquid olive soap (alternatively, bar soap)
a grater if necessary (for solid soap)
colored felting wool (carded wool or sheep's wool)
old towels or dish towels
Hotplate or kettle, thermos for outdoors (for the soapy solution)
vinegar
Here's how:
First lay out your work surface with a plastic tablecloth or another covering. You can also prepare towels and use them as a surface and drip area.
If you chose a bar of soap, take a grater now to make your soapy solution. Fill your water with enough grated soap and distribute it so that it foams. If you use liquid soap, add enough until you get the same foamy result.
Now pull off a portion of your felting wool and tease the edges apart well.
Place your wool on your palm and wet it in the middle with soapy water. Be careful not to drown it.
Then shape your felt ball. Roll the wool with both hands until you get a ball shape.
Moisten your ball repeatedly with a little soapy water so you can continue to rub it evenly with both hands. Do this several times, gradually increasing the pressure on the felt ball. This creates a ball that becomes firmer and firmer. Tip: You can increase the size by continuously adding a thin layer of felting wool around the ball and felting it with water.
Once you have felted your desired ball size and achieved a certain firmness, rinse the ball with clear water. Then dip it in some vinegar to neutralize any soap residues.
Finally, rinse your felt ball again carefully. To dry, place it on a towel.
And there you have your first felt ball. You can make more balls using this principle and glue the finished results into a piece of jewelry or create funny figures. Your craft session doesn't have to end here!
Needle felting / dry felting with children: creating felt motifs
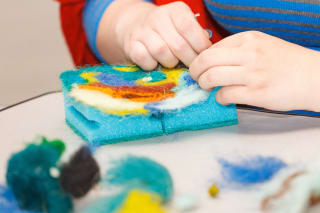
You will need the following materials:
Felting needles with a small barb
Foam pad or sponge as a base
colored felting wool (carded wool, sheep's wool, or fairy wool)
Here's how:
First place your base on your work surface.
Then pull off a piece of felting wool. Make sure this piece is roughly the size of the desired shape you want to achieve. Because the wool will shrink a bit during felting, plan for the piece to be about one third larger.
Roughly shape the felting-wool piece with your hands, similar to modeling with clay, as desired.
Now to the felting: once you have shaped your wool, work it with your felting needle. Always stab straight into your wool. Work slowly through your shape so that the wool fibers hook together via the rough surface and very sharp needle point. Tip: If the shape is felted firmly enough, you can add further details and felt them with the needle as well.
When you have felted your shape and other details long enough that they hold and have become firm, your artwork is finished.
More ideas & instructions for felting with children
Required materials:
stones in various sizes
Felting needles with a small barb
Foam pad or sponge as a base
colored felting wool (carded wool, sheep's wool, or fairy wool)
Here's how:
First, place a stone on your base
Wrap it with several wool fibers. Make sure you leave a round opening so that the stone remains visible.
Felt the wool with your felting needles by carefully stabbing the wool. Be careful not to stab too deep or with too much pressure, otherwise your needle can break on the stone.
If the felt covering of your stone is stable and sits firmly enough, you're done. If you like, you can draw a face on the stone with pens. This turns your wrapped stone into a cute felt animal.
Felting keychains with children
Required materials:
Plastic tablecloth or baking sheets as a surface & drip area
Bowl with warm water
solid or liquid olive soap (alternatively, bar soap)
a grater if necessary (for solid soap)
Felting wool in colors of your choice (carded wool or sheep's wool)
old towels or dish towels
Hotplate or kettle, thermos for outdoors (for the soapy solution)
vinegar
key ring
eyelets
decorative & embellishment materials
Here's how:
First lay out your workspace with a waterproof covering. Then you can start right away.
For the soapy solution, grate a bar of soap into warmed water until it foams. If you choose liquid soap, add it to your water bath until a similar result is achieved.
Now pull off a piece of felting wool and tie a strand to the bottom link of your key ring or to the chain attached to it.
Then shape the strand into a ball and wrap it with more wool until it reaches your desired diameter.
Then dip the ball in your soapy solution. Do not drown it. Rub or roll the felt in your hand into a ball. If you want your felt ball to become larger, repeat the process several times until you are satisfied with the size.
Roll the finished ball over a towel and then let it dry thoroughly.
Once your felt charm is dry, you can decorate it with googly eyes, stickers, or beads. Get creative and make a keychain that no one else has.
Felting by season
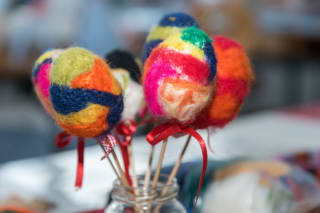
Felting is especially popular at Easter and in the Christmas season very popular. Felt crafts are ideal as decorations that look great. Whether Easter eggs, Easter bunnies, Christmas baubles, or another kind of Christmas tree decoration – you have numerous options to let your imagination run free. Below HABA has for you the most popular ideas for each season gathered. Get inspired for your own creations and get started right away.
Felting with children for Easter
Required materials:
Felting needles with a small barb
Foam pad or sponge as a base
colored felting wool (carded wool, sheep's wool, or fairy wool)
Here's how:
First place your polystyrene egg on your foam base.
Next, pull off some wool in the color of your choice and lay it onto the egg.
Now begin felting the little felt coat onto your egg by taking your felting needles and interlocking the fibers.
Turn the egg gradually and add more wool, which you then felt carefully.
When you are finished and your Easter egg is now wrapped in a firm felt coat, check that there are no white spots left. If you find any gaps, add more wool fibers and felt them in.
An Easter egg is traditionally painted with various motifs. You can now use additional felt colors and felt small motifs on. Do this the same way as before – only with smaller pricks this time.
If your Easter egg shines in different colors and patterns, you're done and can move on to more eggs. Have fun!
Felting Easter bunnies
Required materials:
cardboard
pencil
craft scissors
felting needles
Plastic tablecloth or baking sheets as a surface & drip area
Bowl with warm water
solid or liquid olive soap (alternatively, bar soap)
a grater if necessary (for solid soap)
colored felting wool (carded wool or sheep's wool)
old towels or dish towels
Hotplate or kettle, thermos for outdoors (for the soapy solution)
vinegar
Here's how:
Place your hand on a piece of cardboard and trace your palm with a pencil. Press your fingers together tightly. This creates a template for the bunny body, which you then cut out.
Pull off some wool and place it in front of you. Leave about five centimeters free to tie a firm knot. The remaining piece of felting wool at the bottom is placed around your template. If this is not enough, that's no problem. Take more felting wool and also wrap it around the bunny body.
With more felting wool, then wrap the knot and the five centimeters sticking up. This forms the ears and head of your Easter bunny.
Use felting needles to work the wool around the head so it gains initial hold. Then move on to wet felting.
Prepare your soapy solution by putting soap into your bowl of water. You should cover your work surface with towels or another waterproof covering.
Moisten your Easter bunny with enough soapy solution and rub it well all around. Apply a bit of pressure so that the fibers felt well.
Then rinse your Easter bunny well with clear water, reapply the soapy solution, and repeat the technique once more.
Now rinse your Easter bunny again carefully with clear water, then remove the last soap residues in a vinegar bath.
After the final rinse, let your bunny dry on a towel. Once it's dry, move on to the finishing touches: suggest the ears by lightly snipping them with scissors. Of course, the fluffy tail should not be missing. Make a felt ball and sew it onto the back of your bunny.
Finally, give your Easter bunny a face by stabbing small felt pieces onto the bunny's face with felting needles. And your felt Easter bunny is done.
Felting with children for Christmas
Felting Christmas tree ornaments
Required materials:
cookie cutters
Felting needles with a small barb
Foam pad or sponge as a base
colored felting wool (carded wool, sheep's wool, or fairy wool)
Here's how:
First place the cookie cutter of your choice on your base.
Your children choose the color the ornament should be. Christmas stars or trees can, for example, consist of several colors. Pull off as much wool as fits into the cookie cutter. It's okay if some wool sticks out.
Now stab straight into the wool in the cutter with the felting needle. Feel free to turn the mold several times so you really felt the wool from all sides. Tip: If you notice that there is too little wool in some places, add more fibers. Pay special attention to working the edges more intensively. This ensures the lines become distinct and firm.
When your ornament is firmly felted, carefully remove it from the mold.
You can add small details to your ornament or start making more Christmas tree ornaments right away.
Felting a Christmas tree
Required materials:
Fir tree template made from sturdy cardboard (triangular)
two bubble wrap sheets
wooden stand
wooden spoon
Bowl with warm water
solid olive soap (alternatively, bar soap)
grater
Felting wool in colors of your choice (carded wool or sheep's wool)
old towels or dish towels
Hotplate or kettle, thermos for outdoors (for the soapy solution)
vinegar
Here's how:
Lay a sheet of bubble wrap on your work surface covered with towels.
Then place a triangular tree template on the sheet.
Next, pull off two to three thin layers of green felting wool, which you then place on your template and shape. The wool may slightly overlap the edge.
Take a grater and spread some olive soap over your felting wool.
Moisten your tree with sufficient warm water and place a layer of bubble wrap on top. Press everything down firmly and turn your felting object.
Now remove the bubble wrap that is on top and also the template that lay at the bottom.
To make your tree a true Christmas tree, you just need some snow. For this, take white wool. Lay a thin layer of white felting wool on your tree.
Rub some soap on the felting wool again and moisten your Christmas tree with warm water. Then place the layer of bubble wrap back on top. Press everything firmly and turn your motif again.
Repeat the last two steps now. This way your Christmas tree will sparkle with winter snow on both sides.
To make your Christmas tree really firm, place the bubble wrap on again. Press it firmly against your felt motif on all sides. With slightly soapy hands, rub up and down on the foil with some pressure.
Then roll the foil together with the Christmas tree inward and, with light pressure, roll it back and forth about 20 times before unrolling it again. Turn the little tree and repeat this step.
Do this on both sides of the Christmas tree now. When you are finished, you will have a firm Christmas tree that you can even open by hand at the bottom. Insert a wooden spoon or a thick knitting needle there to work out the tree top. Soap the little tree thoroughly again and again so the felt closes well.
Finally, rinse the Christmas tree in clear water. In a vinegar bath remove the last soap residues, then rinse the tree again. Let your Christmas tree dry on a towel and you are finished.
The Christmas tree can be placed on a wooden stand and used as decoration in the house or apartment.
Frequently Asked Questions about felting with children
Can I do felting with young children?
How long does felting with children take?
What's the best way to wash felted knitted pieces?
More articles about leisure & creativity


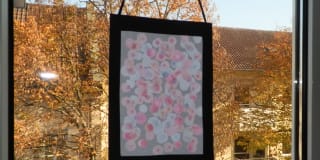

Image credits
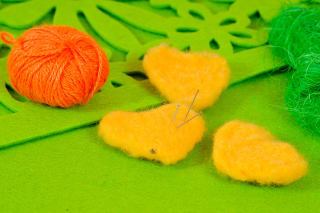
Yellow felted hearts with green felt and an orange ball of yarn © sonne_fleckl - stock.adobe.com
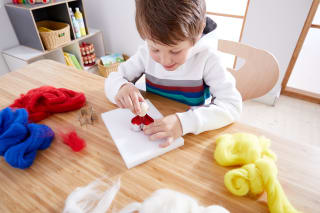
Girl glues felting wool together, standing in front of a pile of colorful felting wool © Margarita SoulRay - stock.adobe.com
Children's hands felting a design on sponges © Sergej - stock.adobe.com
Felting supplies: grater, shaved soap in a bowl, bowl of water © Heike Rau - stock.adobe.com
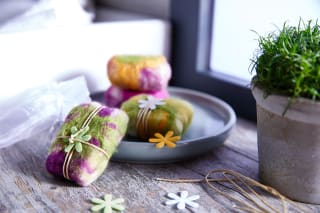
Colorfully felted Easter eggs with red bows on wooden skewers © alho007 - stock.adobe.com
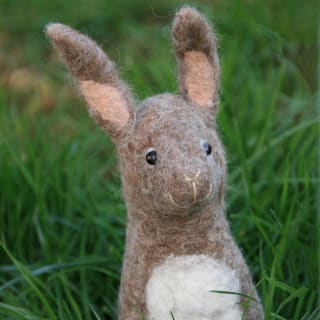
Felted brown rabbit with a white chest sits in the grass © Rainer Albiez - stock.adobe.com