What makes gardening with children so special

As soon as your children can move and perceive their surroundings intensely, they don't stop at the garden either. If they then watch you while you garden, it won't be long until they water the plants, harvest the vegetables, or try out their own projects want to. And what could be nicer than spending time together in the garden? Gardening is also very beneficial for the development of little explorers. They learn the natural cycles and the world of their animal friends get to know better.
A seed grows into a plant, from a plant flowers grow and, depending on the type, also fruits that can be harvested later. But your children also learn that this process involves care and responsibility is associated with, your children learn this while gardening together. "Learning by doing" is the motto here. You will see: With every garden project, the sense of responsibility grows. If gardening then also shows its first successes, the joy is great. The self-confidence of your children grows and the Enthusiasm for the garden increases. And the best part: Together you create new habitats in your garden for bees, butterflies and other beneficial little creatures. Not least through a self-built insect hotel. With a vegetable patch of their own your children also learn step by step how the fruit and vegetables grow that later end up on their plate. And who knows, they might give one or another vegetable a chance and even enjoy eating it later.
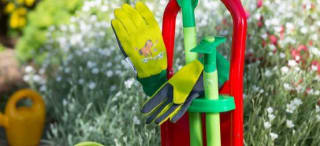
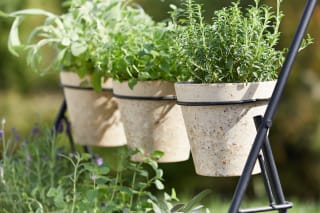
The right equipment for little gardeners
These plants are suitable for gardening with children
Especially important: Make sure that you do not plant in your garden any poisonous flowers, trees, herbs, fruit and vegetable plants plant. Children love snacking on things they picked themselves. For them it is hard to tell which varieties they can eat without worry and which not: Even for many parents this is not always obvious.
Here you will find an overview of all plants that are particularly suitable for gardening with children:
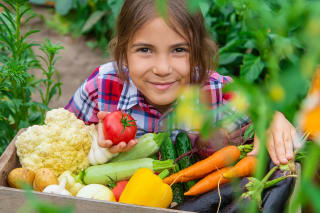
Vegetables
Carrots
(Cherry) tomatoes
Cucumbers
Radishes
Sugar snap peas
Kohlrabi
Fruit
Raspberries
Blueberries
Gooseberries
Currants
Physalis
Flowers
Calendula – flowers are edible
Sunflowers
Nasturtium – flowers and leaves are edible
Daisies
Marguerites
Dahlias
Herbs
Cress
Catnip
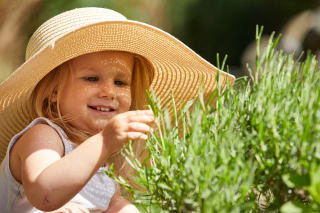
Lavender
Peppermint
Basil
Sage
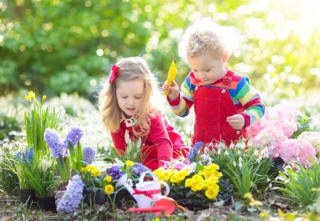
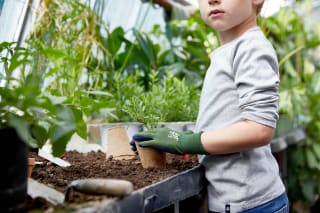
Suitable garden projects for children
While gardening children learn a lot about the animal and plant world in a natural and playful way. Basically there is no age limit for when children can help with gardening. However, it makes sense to include them only to involve them in gardening projects from the age of two. At this age they perceive their environment much more actively. They learn to use their own bodies and abilities, and imitating their parents is already part of everyday life. It's best to start with small tasks and then gradually increase over time. The first tasks can be watering flowers, the planting in flower pots or even the harvesting fruit and vegetables together be.
Anything that does not overwhelm your children and slowly promotes concentration is suitable for the first gardening attempts. Once you have slowly introduced your little hobby gardeners to the plant world, they will most enjoy getting started entirely without your help. Now you can take on larger projects such as a vegetable garden of your own venture. Always decide together with your children which and how many tasks they want to take on.
Creating the first children's garden bed
It's time: you want to to tackle your first big garden project – a children's garden bed. But how do you best start? The ideal children's garden bed is best located directly next to your own bed, if you have one. That way you can watch your little ones directly while working on your own gardening. Also a raised bed near the terrace is ideal for the beginning. Here you always have your children in view and can help with difficult tasks.
As a rule of thumb: The size of the children's bed always depends on the age as well as the skills and interests of your children. If a bed is too big, it tends to overwhelm and takes away your children's enjoyment of gardening. To prevent this from happening, orient yourselves to the body size of your hobby gardeners. If the children's bed is accessible from both sides, it may be twice as wide as a child's outstretched arm. If it's only accessible from one side, the width should correspond to the length of a child's arm so that your children can comfortably reach the middle without stepping into the bed. Which plants you want to plant in your children's bed is entirely up to you. We have Guides for fruit, vegetables and herbs compiled that make creating a children's garden bed easier.
DIY: Creating your first children's garden bed
The most important info and tips for creating a children's garden bed at a glance. Download the instructions now and get started!
Planting fruit & vegetables
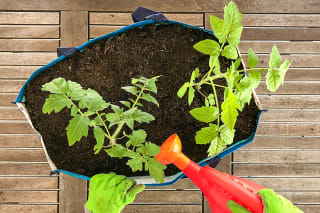
Planting tomatoes
Mmm, tomatoes not only taste delicious, they are also very easy to grow. If you want to take on the 'planting tomatoes' project with your children, you don't need not that many tools – you'll often find them in your kitchen. How best to grow your own seedlings, we show you on the page about planting tomatoes. It's best to start right away and look forward to harvesting your own tomatoes soon.
A DIY hanging shelf for your tomatoes
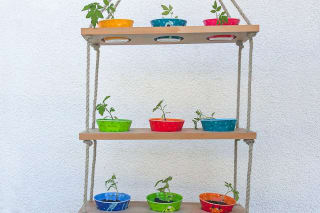
Tomato plants are also decorative: With a hanging shelf, you can skillfully showcase the plants. This gives you more space in your garden for other garden projects. The trick: The hanging shelf for your own tomatoes is suitable for the garden terrace, the balcony, or as decoration in the kitchen. For little snackers it is the ideal place to try a tomato now and then.
Upcycling DIY: Planting tomatoes in shopping bags
If your tomato plants have become too big for the pots have become, they need more space. With a a simple large shopping bag you can help your plants. With this idea you even do something good for the environment.
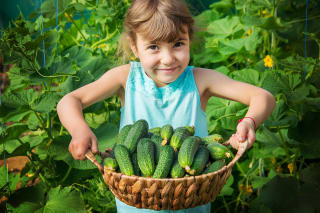
Planting cucumbers
Required materials
climbing support
cucumber plants
soil
garden tools
gloves
compost, farmyard manure or bark humus
seedling pots
watering can with water
step-by-step instructions
First attach a climbing support of your choice at the spot where your cucumbers will grow. The support prevents the cucumber plants from growing tangled and sprawling.
Then prepare the soil by enriching it with mature compost, farmyard manure or cattle manure.
Now plant holes are dug at intervals of 40 centimeters. The row spacing should be 120 to 140 centimeters.
Soak the seedling pots with enough water until no air bubbles rise.
Remove the pots from the root balls of the cucumber plants and place them centrally in the previously dug holes. Press the soil firmly and water the plants.
Tie the shoots of the cucumber plants to the climbing support. Afterwards, the soil can be covered with natural materials such as cattle manure. This promotes the growth of the cucumbers.
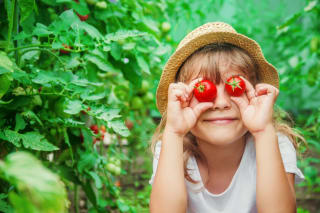
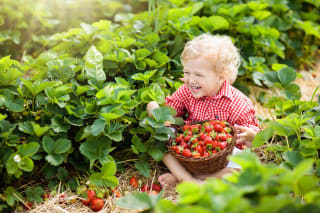
Planting strawberries
Required materials
strawberry plants
soil
garden tools
gloves
watering can with water
step-by-step instructions
Before planting the strawberry plants, water them in the pots in which you bought them: let the plants stand in the water for about one to two hours.
While the strawberry plants are in the water, prepare the soil for your bed. Loosen the soil with a rake and remove large clumps of earth.
Since strawberries need a lot of space, you should plant several rows with a spacing of 20 to 30 centimeters. You can measure this before planting as well.
When your strawberry plants have received enough water, you can plant them in the prepared soil. Plant the individual plants as deep as they were in the pots and completely cover them on the sides. Make sure that no soil gets into the heart of the plant. Otherwise the strawberry plant could rot.
Finally, water the seedlings. You should do this regularly, especially in the first days, until they have established well and new leaves form.
Now it's just a matter of waiting until the first runners grow and the strawberries are ripe for picking.
Planting raspberries

Required materials
raspberry plants
soil
garden tools
gloves
watering can with water
compost & horn meal
step-by-step instructions
First, the root strands of the raspberry plants are shortened by one centimeter. Remove dead and broken roots. The canes should not be longer than 30 to 50 centimeters.
After you have pruned the raspberry plants, place them in water so that the root balls are well moistened. This prevents root diseases.
While the raspberry plants are in the water, prepare the soil. To do this, dig the spot in the bed where the raspberries are to grow to a depth of 30 to 50 centimeters. Then add some compost and horn meal. Important: Remove all weeds and stones from the soil so that it is ultimately crumbly and loose.
Once the root balls of the raspberry plants are sufficiently soaked with water and the soil is prepared, it's time to plant. It's best to plant the raspberries in a row with a spacing of 40 to 50 centimeters. The row spacing should be about 150 centimeters.
Then mound the watered root balls and pull them apart slightly with your hands. Now the raspberry plants can be planted.
Water your raspberry plants and lay out a layer of natural materials such as nettle leaves, conifer or leaf compost to accelerate growth.
Planting herbs
Planting cress
Required materials
cress seeds
soil
small pots or other small planting containers
cotton wool
garden tools
gloves
spray bottle or small watering can with water
scissors
step-by-step instructions
First line your small pots with a layer of cotton wool. The cotton wool serves to retain moisture for a long time. In this step, make sure to lay the layer evenly so that the cress seeds can be distributed well.
Next, pour some water onto the cotton wool layer. It should be moist but not standing in water. Especially in the first days the cress seeds need a lot of moisture to swell. Tip: It's best to use a spray bottle. This way you can better dose the amount of water. This is especially helpful if your children want to take on this task.
Now put the cress seeds into the pots. If moistening the cotton wool has created an uneven surface, smooth it first before sprinkling the seeds. Sprinkle the cress seeds close together. Only then will your cress lawn grow densely.
From now on, water or spray your cress daily with a little water. The cotton wool substrate should always be well moistened. After just one day you can see the first seedlings. After a week your cress is big enough that you can harvest and eat it with scissors. Further ideas on planting cress can be found here.
Planting basil
Required materials
basil from the supermarket or basil seeds from the packet
small pots
soil
garden tools
gloves
watering can or spray bottle with water, cling film
step-by-step instructions
Basil can be grown in two ways.
The first option: growing basil from seeds
Take small pots of about 10-12 cm in diameter and fill them with soil.
Before sowing the basil seeds, you must moisten the soil well. For this you can use a watering can or a spray bottle. Caution: make sure you don't make the soil too wet. Tip: If your children want to take on this task, you should use a spray bottle. That way they can better dose the water.
Then smooth the soil and sprinkle about ten seeds per pot. Press the seeds lightly as well. Important: Do not cover the basil seeds with soil, because they need light to germinate.
Now put cling film over the pots so that the seeds do not dry out. If you place the basil plants in a bright but not sunny spot, growing them is child's play.
After about one to two weeks the first seedlings appear. After three to four weeks the basil plants should be repotted.
The second option: planting ready-made basil plants from the supermarket
Divide the purchased basil plant into several parts. From a commercially available pot you can grow about 4 individual plants.
For this, take pots that are a little larger than the pots in which you bought the basil plants. Fill them with fresh soil.
Then set the plants in, cover the top with soil and water a little.
Now you can place the basil plants in a warm spot in your garden, on the terrace, or in the kitchen. Make sure they get enough sun.
12
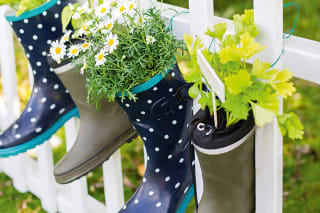
Digging in the soil, watching plants grow, harvesting radishes and other vegetables, and learning new things about the animal and plant world – all of that is also possible without your own garden. If you have a balcony or an allotment garden you have, nothing stands in the way of gardening with children.
All you need are flower pots, window boxes and your gardening tools, to tackle your own projects. Even a raised bed fits on even the smallest balcony and provides the perfect foundation for your own planting and harvesting ideaswatch herbs or seedlings grow. And they also make a nice decoration.Children's games about nature
And if the little budding gardeners
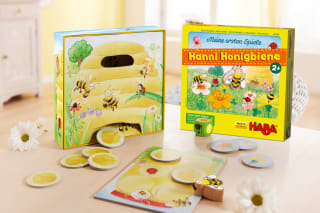
feel like a great indoor children's game they can have fun with our two gardening games"My First Games - First Orchard" or My First Games – Hanni Honeybee have lots of fun and learn something in the process.Gardening without your own garden – is it possible?