Tips & ideas for Christmas crafts
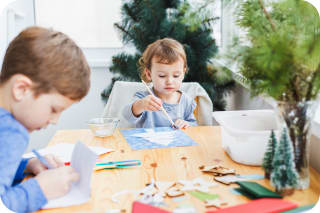
If it's cold and frosty outside, anafternoon of crafting in the cozy homeis twice as much fun. When crafting together for Christmas,excitement for Christmas Eveand the upcoming holidays arises, bringing the family even closer together.
Of coursethe little artists primarily have a lot of fun crafting. They can let off steam while painting, gluing and cutting and give free rein to their creativity. In doing so, your children playfully train their little hands, and in the processfine motor skills are promotedare.
Decide together which craft ideas you'd like to make.Ask your kids, which ideas, motifs or projects they most feel like doing when Christmas crafting.
Among theclassic craft motifsduring the Christmas season are clearlysnowmen, Christmas trees, stars, angels, reindeer, snowflakes and Santas. From window decorations to garlands, you cancraft Christmas decorations, that are guaranteed to be one of a kind.
Or you can use Christmas crafting with your children to make the firstChristmas gifts. If it shouldn't be a gift, but just asmall tokenthen why not get started together oncrafting beautiful Christmas cards. A homemade Christmas greeting will surely please grandma, grandpa, aunt or uncle.
Also ahomemade advent calendarsweetens the time until Christmas for your children and is even a breeze for inexperienced crafters.
As you can see, you and your kids have plenty of options for Christmas crafting to bring the most beautiful ideas and DIYs to life with your own hands: get into the Christmas spirit and let the holidays begin!
Important when Christmas crafting with toddlers under three years old
If your child is still very young, you can still realise great ideas when crafting for Christmas. Note that children under three years only have ashort attention spanhave. When planningcrafting with toddlersit's best to plan ideas that your kids won't work on for longer than 15 minutes.
So that your children aren't overwhelmed, always choosecraft ideas according to the ageand the dexterity of your little ones. Make sure the instructions are not too difficult or the crafts not too delicate. Of course you should – especially with toddlers – when Christmas craftingalways keep an eye on your kidshave.
These materials are suitable for Christmas crafting with children
When crafting for Christmas with your children, you can use and work with all kinds of materials. The best part: The most craft supplies you probably already have at home and can get started right away. But you can also find suitable accessories at HABA to create beautiful Christmas crafts with your children. We'll now show you which materials are suitable for Christmas crafting so you can most beautiful ideascan put into practice right away.
Materials and tools for popular Christmas craft ideas
Felt
Wood
Pricking sets
Wax sheets
Candle pens
Craft templates
Cotton wool
Feathers
Salt dough
Pine cones & pine branches
Dried flowers
Craft glue
Pens
Paints
Craft scissors
Craft instructions for Christmas – creative craft ideas for every age
You probably want to get started right away – so grab craft scissors, glue and paper and let the fun begin! Here we've gathered the best ideas for Christmas that you can craft at any age.
Craft ideas for toddlers and preschoolers (2–5 years)
Christmas figures from salt dough
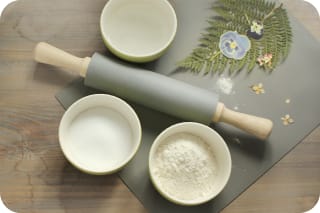
Salt dough is quick and easy to make and ideal for Christmas crafting with children. The little artists can knead and shape the dough to their heart's content and create Christmas artworks, which they can later decorate or paint. Attach the finished decorations later to the Advent wreath, the windowsill, or the Christmas tree.
Materials needed:
2 cups flour
1 cup water
1 cup salt
small bowl
rolling pin
cookie cutters
crafting mat
smock or apron (optional)
How to do it!
First make the salt dough together. Mix the ingredients in a small bowl and knead the mixture well until a smooth dough forms.
Now the crafting fun begins. Your children can roll out the dough with a rolling pin on a crafting mat and cut out shapes. Christmas cookie cutters work best. But the little ones can also shape Christmas decorations by hand.
If you're happy with your creations, they need to be baked. Place them on a baking sheet. If you want to hang your Christmas ornaments on the tree later, poke a small hole in the dough with a wooden skewer before baking.
Now your creations go into the oven for several hours. At about 100 degrees Celsius the salt dough dries. Alternatively, you can dry it on the radiator – after a few days the dough is firm and ready to paint.
Once the salt dough is thoroughly dried, it can finally be decorated and embellished.
DIY bird feeding garland
Materials needed:
Apples
Pine cones
Pine cones
Suet balls
Twigs
Wood slices
String
Tools:
Scissors
Drill
Knife
How it's done:
Cut the apples halfway through with the knife.
Cut a piece of string to the desired length.
Tie on a small twig, press the string into the apple cut and slide it close to the twig.
Thread or knot pine cones, drilled wood slices, apples, twig pieces, suet balls or pine cones alternately.
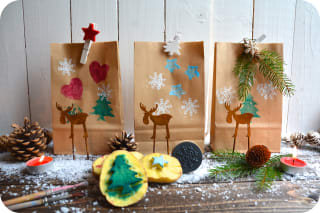
Make a festive decorative lamp with paper lunch bags
Materials needed:
2 paper lunch bags
1 jar
How it's done:
Fold one bag lengthwise several times and cut small patterns into the folds and along the edge.
Open the bag again.
Open the second bag and insert it into the first bag.
Place a jar inside and fold the edges of both bags over 2 to 3 centimeters.
Place a tealight in the jar.
Tip: So you don't burn your fingers: use a spaghetti noodle instead of a match to light it.
Upcycling idea:Use old jam or mustard jars for your decorative lamp. It looks chic, saves money and is sustainable!
Paint Christmas pictures
Whether on the fridge, in a picture frame or on the wall in the children's room – cheerful Christmas pictures spread a festive atmosphere and are also nice to look at. Use a shared afternoon in Advent to paint some great Christmas pictures for your home or as a small Christmas gift for grandma or grandpa to paint.
Materials needed:
Paper
colored pens or watercolors
Paintbrushes
Coloring template (optional)
Glitter, stickers or other materials for decorating (optional)
How to do it!
Lay out all your materials. You can use our free template or let your little artists get creative. It's best to let your children decide how they want to design their picture.
Let the little ones do it. You can of course also paint a picture yourself so you can enjoy the crafting session together. After all, crafting together is the nicest.
When the picture is finished and your child is happy with their artwork, choose a nice spot to hang it up.
Craft ideas for children (from 6 years)
Make Christmas stars
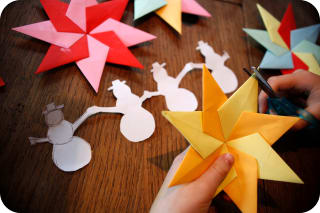
Stars are part of Christmas just like fir trees, angels, snowmen or St. Nicholas. As a symbol of Christmas they adorn windows, walls and the tree topper. And the best part: Make Christmas stars is child's play. Grab your children and the necessary craft materials and let the star magic begin.
Materials needed:
colorful craft paper
Scissors
Craft glue
How it's done!
Download our free craft instructions. Here we show you exactly how to fold and make your Christmas stars.
For the basic shape you need four rectangular pieces of paper measuring 10 x 6 centimeters.
Fold the rectangles lengthwise and unfold them again so that an edge forms. Now fold the two lower corners toward the center and glue them down.
Fold the lower corners toward the center again so the point of the star forms. Again, brush some craft glue on the paper and let it dry.
Now fold the two upper corners toward the center once, creating the shape of a kite. Glue only one side; the other side will later be used to connect all the star points together.
Once you've made all four star points from paper, it's time to assemble your glowing Christmas star. This requires a little dexterity – help your children so everything holds together. You can see how it works in the pictures in our craft instructions.
Done – now you can admire your creation and together find a nice spot on the Christmas tree.
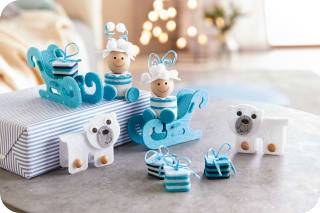
Pompom Santa
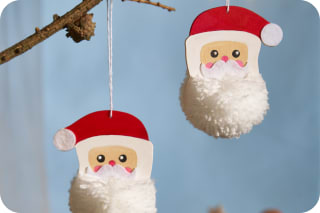
Santa Claus with his bushy beard looks funny and is a particularly nice decoration for the Christmas tree or a cool gift tag.Of course, when crafting for Christmas with children, a authentic St. Nicholas shouldn't be missing – and our craft kit already provides the most important components.
Materials needed:
Craft kit 'Pompom Santa'
white yarn
Scissors
acrylic or water-based paints
Paintbrushes
felt-tip pens
How to do it!
Take one of the tags and paint it as you like, then let it dry well. In the meantime you can paint more tags or enjoy a delicious hot cocoa.
When the tag is dry, thread the white yarn through the opening. Once you've wrapped the entire disc thickly, make a tight knot.
Now cut the sides with scissors so your pompom forms. Shape the bushy beard with your fingers until you like your St. Nicholas.
Now only the funny moustache is missing, which is also included in the kit. With a drop of glue it's quickly in place and Santa is finished.
Funny Elo Moose Mask
Do you already know our Christmas friend Elo Moose? With his big googly eyes and fluffy head he not only looks cute but also fits wonderfully with the Christmas celebration. If your children would like to slip into the role of our dear moose, quickly download our free craft template.
Make a Christmas outfit for Elo Moose
Brr, it can get quite cold at Christmas. Want to help our Elo Moose stop feeling so chilly? Then craft him a stylish and warm Christmas outfit. You only need our template, scissors and pens – and the Christmas crafting can begin.
Create festive soft clay tags
Materials needed:
air-drying modeling clay, e.g. Efa-Plast Kids
satin ribbons in various colors
Tools:
old newspapers as a table cover
cutters in shapes of your choice (e.g. stars or hearts)
drinking straws
Scissors
How it's done:
Roll the modeling clay into a plate about 1 cm thick and cut out circles (Ø approx. 7 cm).
Punch the circles with the cutters and poke a hole with a drinking straw.
Let the modeling clay dry (approx. 24 hours).
Hang the tags with satin ribbons.
Tip: Use stamps, lace or doilies to add texture to the modeling clay before cutting out the circles.
Craft ideas for older children (from 8 years)
Nativity scene
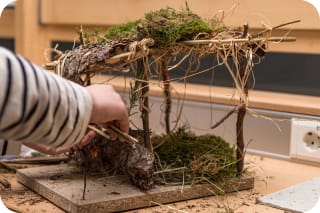
Child making a nativity scene © Karoline Thalhofer - stock.adobe.com A nativity scene should not be missing under any Christmas tree. Even nicer than a bought nativity is a homemade one. If your children are a bit older, it's a nice craft idea, that you can make together. Use the next forest walk with your children in the fresh air – that way you combine family time and crafting fun.
Materials needed:
Branches
Moss & straw
Bark
Hammer & nails
Twine
a small coping saw
a wooden board
crafting mat (optional)
How to do it!
Lay out all the materials for crafting. It's best to use a mat to avoid damaging the table.
Place the wooden board in front of you – this will be the base of the nativity scene.
Now choose four suitable pillars from your collected branches to attach in each of the four corners. First cut them to size with the coping saw. To attach them to the base plate, hammer a long nail from below through the wooden board to hold the branches later. You should help your children with this step.
Once the basic frame of the nativity scene is in place, you can start crafting the roof. Tie four branches horizontally to the corner posts with the twine.
You can cover the roof from above with bark. Place straw and moss inside the nativity.
Decorate the finished nativity with the figurines you can find at HABA and place it under the Christmas tree.
Make Christmas tree decorations
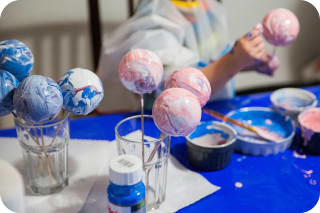
A great Christmas craft is homemade Christmas baubles, with which your Christmas tree will certainly shine even more. In doing so, each piece is a true one-of-a-kind.
Materials needed:
Glass baubles
Hanging ribbon
Acrylic paints
Paintbrushes
small bowls
crafting mat
jars & wooden skewers for drying
How to do it!
Choose the colors you like and pour them into small bowls. You can also mix the colors and stir them with a wooden skewer to create a beautiful pattern on the bauble.
Skewer the glass baubles onto a wooden skewer so you can hold them better while crafting.
Now apply the paint to the baubles with a brush. Make sure the underside gets enough paint as well.
If you're happy with the result, let your Christmas baubles dry well overnight. The next day you can thread the hanging ribbons and hang up your self-made Christmas decorations.
Frequently asked questions about Christmas crafting with children
When should we start crafting for Christmas?
Which popular motifs are suitable for Christmas crafts with children?
Which natural materials are suitable for Christmas crafting?
More articles about leisure & creativity
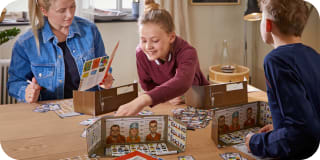

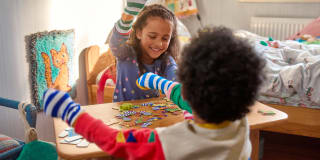


Image credits
Two children painting and crafting at the table © sweetlaniko - stock.adobe.com
Hand-decorated paper bags © S.H.exclusiv - stock.adobe.com
Handmade paper Christmas stars © oranguta007 - stock.adobe.com
Nativity scene made from natural materials © Karoline Thalhofer - stock.adobe.com
DIY marbled baubles © Fotografie-JW - stock.adobe.com