Inspiration & tips for summer crafting with children
Crafting with children in summer couldn't be more varied. There is a huge selection of motifs just waiting for you to bring them to life.Especially nature with its exciting animal and plant life offers you wonderful inspirations for homemade artworks.
Whether butterflies, sunflowers or mobiles made from natural materials – your surroundings and even your holiday destination will certainly provide you with plenty of ideas and inspire creative crafting sessions. Your imagination and creativity are limitless.
Wild snipping sessions, colorful messy play, more precise painting or funny gluing activities – your little artists love to work with colorful materials. In addition to the usual crafting supplies there are – similar to Autumn crafts – also in summer beautiful natural materials, which you can use for your artworks. Your little hobby artists will surely be looking forward to unpacking finger paints, watercolors and co. and exploring the motifs of summer.
It is important that you always involve your kids in the preparations for your next craft project. That makes them proud and you as parents will also get new crafting ideas you might not have thought of. In general you should choose craft instructions and DIYs according to the age, interests and especially the existing skills of your little crafters select.
While with Crafting with toddlers due to their shorter attention span rather small craft projects and simple instructions should be implemented, older children can already demonstrate their handiwork skills and dexterity when crafting.
The older your kids get, the more they like to have a say in choosing your next project and indicate which steps they would like to do independently. The basic rule for all your crafting sessions: have fun and enjoy the shared family time. It's best to grab your craft supplies and get started right away. Have fun crafting!
What are the benefits of crafting with children in summer?
Summer crafting together is something very special for children. It offers them an easy and new access to the world right outside their front door. In this way the fun of crafting is unconsciously combined with learning success, as they almost soak up the new knowledge about the animal and plant world.
Even on holiday your little crafters can learn new things while collecting shells and other holiday finds and incorporate all of that into their summer crafts. In doing so you create beautiful keepsakes that will make you fondly remember the summer months.
Additionally, crafting in summer is a great alternative to pool visits or other outings with children is. It involves so little effort that it is perfect for free afternoons – whether indoors or outdoors. Even in rainy weather the crafting fun is guaranteed. Hours spent crafting together also strengthen your family bonds. With lots of love, the most wonderful artworks are created together, which also make lovely personal gifts for friends and family.
Summer crafting: Materials you absolutely need
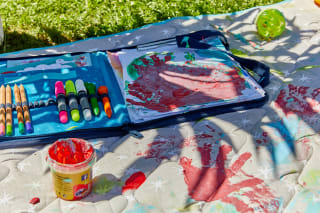
To get really creative in the summer months and implement sweet craft ideas with your children, you need besides lots of fun also the right materials and utensils. Here HABA has put together an overview to guide you. You probably already have some of these at home, so you can get started right away!
Materials:
Paper, cardboard or paper plates
natural raffia & jute twine
paintbrushes
painting smocks & aprons
shells
wood
small & large stones
blossoms & grasses
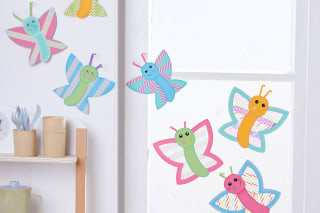
Flowers, butterflies & co. – homemade crafts for summer
Similar to spring crafting you can also in summer easily make beautiful decorations yourself. Whether fresh flowers, paper flowers or cute window decorations that make you long for warm summer days even more – the choice of motifs and the number of easy craft tutorials to recreate is huge. Animals and plants from the underwater world such as fish, shells and starfish are also popular when crafting in summer.
HABA has compiled the most popular ideas for beautiful and colorful creations that will surely inspire you.
Felting with children
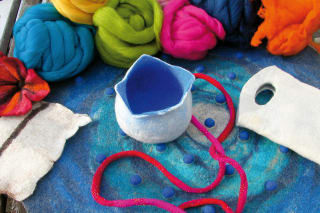
Children love working with different fabrics. Above all, felting has captivated children. When cutting, gluing and shaping, they feel the wool and the surfaces they wrap with it.
That additionally individual and special artworks emerge is the absolute highlight. Especially toddlers are amazed at what they have created with their little fingers.
What the craft technique of felting is all about and how to best put it into practice, you can find out on HABA's page about felting with children. Browse the tips and get started right away, you'll certainly have lots of fun.
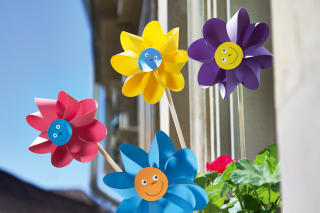
Making flowers
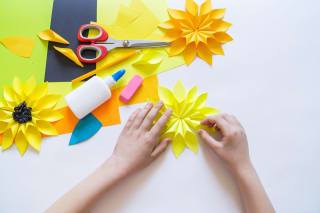
A popular creative activity for children in spring and summer is making flowers. That is sure to bring you as parents a lot of joy too. Flowers come in a wide variety of colors and shapes, so paper flowers can be made in all imaginable variations and used as decorations. The best part: homemade flowers last much longer than fresh.
On the related topic page, HABA has provided not only great craft ideas but also simple DIYs and instructions that you can easily recreate. Get inspired and put the tips and ideas into practice right away.
Sunny window pictures for young & old
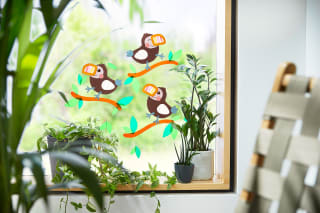
Colorful window pictures really make an impact. They particularly stand out in summer. Even making the colorful window decorations is a great deal of fun – whether you're crafting with toddlers or older kids. In this family activity, adults and children relax alike. Just let your creativity run free.
Which window pictures can you create together with your children? In HABA's craft range you'll find a versatile selection of cute, colorful and easy-to-use craft kits for great window pictures. Have fun discovering!
Wood crafts for little carpenters
If you want to prove your dexterity and your handiwork skills to demonstrate, wood crafts are the perfect projects for you. Wood can be glued, painted, drilled or worked with nails, which makes little craftsmen's hearts beat faster.
Even toddlers are allowed to actively help with the building an insect hotel or other great wood craft projects.
In HABA's craft range you will find many different wooden kits, just waiting for you to make them. Browse the wide selection and find the craft kits that suit you.
O•O Hack: Drip-free ice cream enjoyment in no time
Summertime is ice cream time. When temperatures rise, the tastiest refreshment is an ice cream. But it literally melts like ice in the sun, running over fingers and then onto pants, shirts or shoes. Especially small children lick in the heat as if racing the sun … and end up covered in sugary mess.
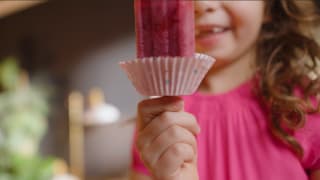
To prevent this from happening:
Cut a small slit in the center of the paper
Pull the cupcake liner up over the wooden stick from below
This way ice drops end up in the paper and not on fingers and surroundings.
By the way: You can also use the cupcake liners as wasp protection by inverting them over drinking glasses. Push the straw through the slit.
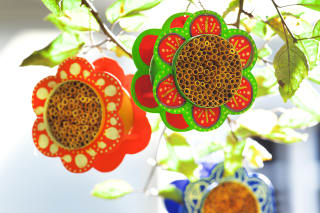
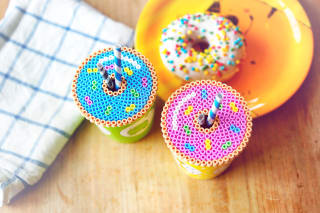
O•O Hack: Make wasp and dirt protection for summer drinks
On hot days not only we humans are very thirsty. Insects also look for refreshment everywhere. Especially the little, cheeky wasps are always the first when a tasty drink is nearby. But also flowers, leaves and other fluttering things easily end up in outdoor drinking glasses. Therefore: Put a lid on it to keep wasps & co. out! We have a smart O•O hack ready for you that makes your drinks safe in summer:
A DIY lid made from fuse beads is really practical for that, quick to make and beautiful. We have great templates for you from lemon to rainbow that you can download for free and recreate with colorful beads.
In our shop you can find, for example, the NABBI® organic fuse beads. These are made from renewable materials and fully compostable. 5,000 pieces in number – plenty of supply for many, many jar lids. 3 pegboards are also included.
And here's how:
Place the fuse beads on the pegboard,
cover with ironing paper and
iron over with the iron according to the instructions.
In doing so the beads fuse together.
Craft ideas & instructions for a creative summer
Would you like to craft summery motifs and great decorations now but don't know exactly where to start? HABA has for you many beautiful ideas and craft tutorials collected that you can easily recreate. They help you create the most beautiful artworks and really enjoy the summer months. So let's go: Get your craft supplies ready, set, go!
Summer craft ideas for kindergarten and toddlers
Toddlers love to snip, paint or smoosh with their tiny hands. Once they get started, there's no stopping them. They often encounter their first crafts in kindergarten, so they want to recreate them at home with you parents and relive the joy. HABA has compiled the most popular craft ideas for toddlers in summer together. Pick the instructions that suit you and get started right away!
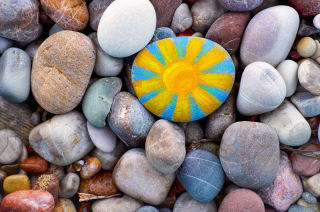
Painting stones
Materials needed:
stones in all kinds of shapes & sizes
paintbrushes
waterproof markers
old newspaper
Step-by-step instructions:
First prepare your workspace by covering it with newspaper. This ensures no paint splatters go astray.
Then you can get started right away. Think about how you want to paint the stones and whether you want to sketch nice patterns. Paint merrily. Whether dots, hearts, stripes, single-colored, two-colored or little animals like bees, butterflies or fish – your creativity has no limits.
There are also numerous other methods to beautify your stones. You can stick stickers on them, wrap them with yarn or decorate them with stamps – everything is allowed.
When you are finished with your stones, let them dry well. Afterwards they can be used as beautiful decoration or for fun garden games can be used.
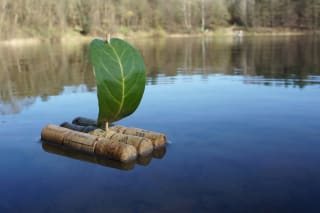
Make boats from corks
Materials needed:
3 corks
toothpicks or skewers
leaves you've collected earlier
craft scissors
craft glue
hot glue gun
Step-by-step instructions:
First heat up the hot glue gun so you can attach the three corks together with the liquid adhesive. The corks form your boat hull. Tip: To prevent your children from burning their little fingers, it's better if you as parents do this step.
To set up a sail you need a mast. For this, take a toothpick and attach it to the middle of your cork hull. For larger boats it's best to use a skewer adjusted to the right length and attach it to your boat.
Design the sail for your boat using a leaf that you pierce at the bottom and top with your toothpicks. Tip:The sails for cork boats can also be made with construction paper or toilet paper rolls. You can find a suitable tutorial on the page about making your own games.
And your cork boat is ready!
Colorful pinwheels
Materials needed:
thick, colorful construction paper
wooden sticks (approx. 10 mm thick, round or square)
colorful beads (ø at least 1 cm)
wire 1 to 1.5 mm thick (e.g. copper wire)
wood drill bit
ruler
craft scissors
pencil
needle
pliers
Step-by-step instructions:
First cut the construction paper into shape. To do this, draw a square at least 18 by 18 centimeters with a pencil and then cut it out. Tip: If you prefer a slightly larger pinwheel, you can also draw the square in larger dimensions.
With a ruler draw a line from one corner to the opposite corner of the square. Do the same for the other two corners. Two lines will cross in the middle of the square dividing it into four equally sized triangles.
From the center measure about 1.5 centimeters along each line and mark a small point. Cut into all four corners along the lines up to the marked point.
Now use a needle to poke five holes into your square. Place the holes in each of the four corners and one in the center.
Then prepare your wooden stick. Drill a small hole about two centimeters from the end with a wood drill bit.
Now cut a piece of your wire about 20 centimeters long and pull it through the hole in your wooden stick. Wrap the stick several times with the wire. Then twist the ends tightly together so they don't come loose. Cut off one of the two long ends using the pliers.
In the next step thread two beads onto the remaining end of the wire.
Next comes your construction paper square. Slide it onto the wire using the middle hole. Then thread one triangle after another over the holes at the respective corners. This way the blades of your pinwheel are created one by one.
Finally, add another bead to the wire. Shorten it slightly with the pliers and form a small loop, which you also insert into the bead. Your homemade pinwheel for summer is ready.
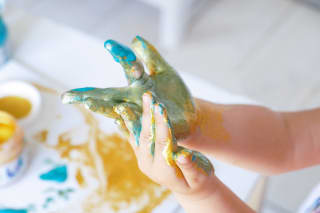
Safari animals from handprints
Materials needed:
blank paper in various sizes
finger paints or watercolors
small bowls for the paints
paintbrushes
old newspaper
masking tape
painting smocks or old clothes
pens & paints
googly eyes
Step-by-step instructions:
First lay out your workspace with old newspaper. Lightly attach the blank paper you want to stamp your hand animals on to the newspaper with some masking tape at the four corners. This prevents it from sliding while crafting.
Pour your finger paints into slightly larger bowls so your children's hands fit well.
Now it's your kids' turn with their handprints: have them press their palms firmly into the finger paint. Tip:Some toddlers may still need a little support here. Apply the paint thickly to their palms with a brush.
Then gently press your hands onto the paper. When you lift them off you'll see your colorful handprint. Tip:Depending on the animal, it makes sense to shape the fingers into a certain position. For example, pressed together index and middle fingers can create cute ears. Individual thumbprints become little fish or insects.
If you're happy with your handprints, let them dry well. In the meantime wash the finger paint off your hands.
Once your handprints are well dried, move on to adding details. Paint on all the missing body parts of your animals and decorate them with nice patterns.
Finally, paint nice faces on your hand animals. You can also use googly eyes for this. Again: let your creativity run free.
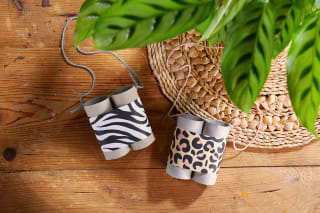
Binoculars from toilet paper rolls
Materials needed:
toilet paper rolls
colored construction paper
yarn or parcel tape
craft scissors
craft glue
old newspaper
masking tape
painting smocks or old clothes
pens & paints
googly eyes
Step-by-step instructions:
First cut your construction paper into a strip. It should be slightly narrower than the two toilet paper rolls but long enough to wrap around both.
Glue the two cardboard rolls together. Apply some craft glue to the long sides of the rolls and press them together.
Now wrap the paper strip tightly around both toilet paper rolls and secure the ends with glue.
Little explorers should of course be able to hang the binoculars around their necks. To do this, attach a long yarn or sturdy parcel tape to the outer edges of the toilet paper rolls. Poke small holes and then thread the strap through. Knot the ends inside the rolls.
And your binoculars are ready – ready for the next discovery tour.
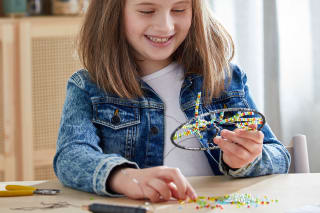
Craft ideas for primary school children
The fine motor skills of children of primary school age are much more developed than those of kindergarten children. Accordingly, you can implement much more demanding craft ideas and tutorials . Parental support here is only desired when your hobby artists specifically ask for it. Now you probably want to start crafting right away. What are you waiting for? Grab your craft supplies and start painting, tinkering or drawing! Joy is guaranteed here.
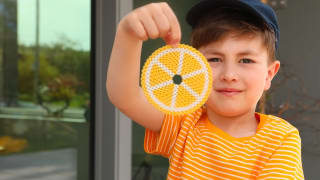
Insect protection made from fuse beads
Materials needed:
fuse beads
pegboard in a circular shape
baking paper
ironing pad (e.g. a dish towel)
iron
Step-by-step instructions:
First place the pegboard in front of you. Using the first fuse beads, lay out the basic shape, i.e. the contour of your desired pattern.
Once you've come up with a nice pattern, fill it in with fuse beads in the colors of your choice.
Now it's time to iron: place your finished pegboard on an ironing pad. Then place a piece of baking paper over your pattern. With the iron set to level two, gently and evenly run it over your fuse bead pattern. Do this until the beads on the top have melted together. Tip: Do not press the iron too hard or for too long, as the pegboard can melt.
And there you have your insect protection made from fuse beads, which will make it hard even for the busiest bee to get to your drinks.
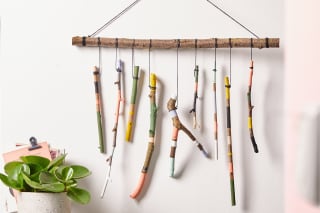
Stick mobile
Materials needed:
sticks in all sorts of shapes
acrylic paints
paintbrushes
plates for the acrylic paints
waterproof markers
masking tape
thread
craft scissors
old newspaper
Step-by-step instructions:
First cover your workspace with newspaper so no paint splatters go astray.
Next, think about how you want to design the sticks. Which colors and patterns would you like to use? Once you've decided, you can start painting.
Place paint blobs of the acrylic paints you want to use on a plate. Then place all the sticks in front of you and paint them one after another. You can make them uniform or colorful by painting lines, dots or other shapes. Go wild as you like! Tip: To get even color patterns, tape off the areas you don't want to paint with masking tape.
Paint happily until you've decorated all the sticks as desired. Then let them dry well.
Finally, tie the individual sticks to your largest stick so that piece by piece a beautiful mobile is formed.
Your stick mobile is ready and can now be hung in a suitable place.
Flower press

Materials needed:
flowers & petals of your choice
craft scissors
sharp knife
vase
1 tsp sugar
1 thick book or a flower press
printer paper
tweezers
Step-by-step instructions:
First prepare your collected flowers and petals to prevent color loss. To do this, dip the flower stems in water immediately after picking. Then remove the stem ends one after another with a sharp knife or craft scissors.
Remove drooping or damaged leaves and place the flowers in a clean vase with water and a teaspoon of sugar. Then leave them for a few hours in a cool, airy place out of direct sunlight.
After this time, remove the flowers from the vase and dry the stems well. This prevents mold.
Now you should press the flowers immediately. The easiest way to press flowers is with a book. Place a sheet of printer paper in the middle of your book and lay the fresh flowers and petals on it with some space between them. The flower heads should point downwards. Place another piece of paper on top or fold your paper so that both sides of the flowers are covered.
Now close the book carefully. To increase the pressure, place more books or another heavy object on top. You should not open it from now on. If you use a flower press, close it tightly.
Change the paper after a few days. Do this as often as necessary until your petals are completely dry. Pressing takes about two weeks.
Once your petals are dry, it's best to touch them only with tweezers. Dried petals are very delicate and can easily break.
Now you can glue your dried petals onto cards, place them in a picture frame and hang them up, or make other great pictures. Have fun!
Make dreamcatchers
Materials needed:
Dreamcatcher Tree of Life by HABA
craft scissors
additional craft beads (optional)
Step-by-step instructions:
First wrap the entire wire ring with wrapping wire.
Then cut seven pieces of wire, each 60 centimeters long.
Bend each of the seven wire pieces in half, then twist them around the wire ring and twist them about two centimeters.
Now take two of the wires and twist them together for about two centimeters. Do this again with two other wires and then with the last three wires.
Wrap the resulting trunks (three in total) into a tree trunk. The tree trunk should be four centimeters long in total.
For the branches of your tree of life, twist together four wires twice and six wires once.
To make the branches look nicely spread out, take two single wires at a time and bend them in various directions.
Finally, you can decorate the branches. Thread colorful beads onto each wire branch as you wrap it around the wire ring. Cut off any protruding ends.
And your tree of life is ready – for love, luck and peace.
Wooden walking dollies
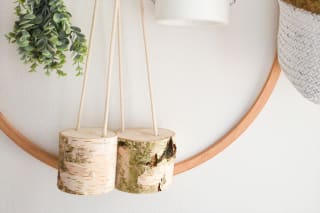
Materials needed:
25 cm wooden log (ø approx. 10-12 cm)
saw
sandpaper or sanding machine
cordless screwdriver/drill
Forstner bit or branch hole drill (ø 20 mm)
wood drill bit
approx. 3 m rope (ø approx. 6 mm)
craft scissors
tape measure or folding rule
hot glue gun (optional)
cotton cord (optional)
Step-by-step instructions:
Note: It's better if you as parents take over the first steps. Your kids can still assist you as eager little helpers.
First, saw the log into two equal pieces so that they are each about eight to ten centimeters high.
Using the Forstner bit or branch hole drill, drill two holes in each log piece. Position the holes near the edge of the pieces. Tip:If you drill the holes only about 25 millimeters deep, they will serve as great hiding places for the knots of the rope ends.
With the wood drill bit that makes smaller diameter holes, drill completely through the holes you made earlier.
Now it's time to sand. Your children can help you with this. Take some sandpaper and smooth the log surface. This removes splinters and irregularities.
In the next step, take care of the ropes. Cut them into two equal lengths. Adjust the ropes to your size so you can hold them well in your hands when standing on your walking stilts. Tip:To prevent the rope ends from fraying when threading, you can wrap them with tape and remove it when you're done.
To decorate your ropes, cotton cords in various colors are suitable. Simply wrap them around your ropes and knot them securely.
Once you've decorated your rope, thread it through. Take one end of the rope, push it from above (through the small hole) all the way through the log piece and tie a double knot. Do the same on the other side.
Finally, secure the knotted rope ends in the large holes with glue. Your wooden walking dollies are ready and you can now happily walk on them.
Crafting for the garden
The summer months are the perfect time to beautify your home garden or balcony. Whether painted pots, colorful plant labels or more intensive gardening work like your own <PDF>kids' garden bed or other projects with the <Link> gardening with children – everything is possible. Toddlers and older children both get their money's worth here, as they learn new things about theplant and animal world and at the same time implement great garden projects that make them shine with joy.
It certainly fills you as parents with joy too when you craft with the little ones in hours spent together. Last but not least, you can also tackle more <Link> garden ideas for children that allow you to enjoy relaxed moments in your own oasis of well-being with a clear conscience.
Frequently asked questions about summer crafting with children
At what age are children ready for crafting in the summer?
Which natural materials are best for summer crafting with children?
What alternatives are there to summer crafting with children?
To the latest articles from this topic area

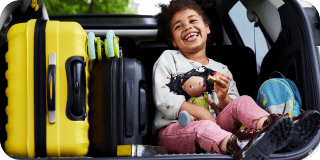

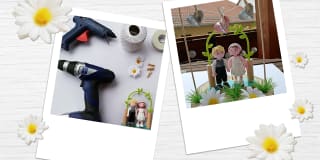


Image credits
Children's hands craft sunflowers from yellow and orange craft paper © Дарья Колпакова - stock.adobe.com
Painted stones © rosinka79 - stock.adobe.com
Boat made of corks floats on the water © Herb - stock.adobe.com