Craft Christmas decorations for every age

Even very young children have great fun crafting. Especially gluing and painting are popular tasks for the little ones. There are many simple craft ideas for Christmas decorations that even Two- and three-year-olds can actively join in. Your child can take on smaller tasks such as decorating or coloring with colored pencils or finger paints. But always keep an eye on your little ones while crafting.
Older children already craft, cut and glue independently or implement their own ideas for Christmas decorations into practice - it can be bigger sometimes. Let your child have a go, even if a star isn't cut out perfectly or the window decoration is half covered in craft glue at the end. Much more important is that everyone has fun. After all, crafting the decorations together is also meant to help you get into Christmas with your children to get in the mood!
These craft materials you'll need for homemade Christmas decorations
Before you and your children start on the individual Christmas decorations, you'll of course need the right craft materials and tools, so you can fully let loose while crafting and bring creative ideas to life. You probably already have many of these things at home! Here we've listed the most important materials and tools for crafting for you and your children:
Craft scissors
Craft glue & paste
Hot glue gun
Pens (pencil, colored pencils, felt-tip pens & wax crayons)
Acrylic & watercolors
Construction paper in various colors
Tissue paper or translucent paper
Embroidery needle & embroidery thread
Craft felt
Craft templates & stencils
colored paper
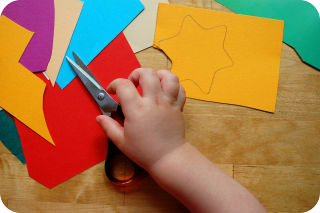
For children, the best are child-safe craft scissors without points and a an easy-to-dispense glue stick. Once you have all the important materials together, the crafting fun with your children can begin and you can try out many great craft ideas for Christmas decorations together!
Where can I find Christmas craft templates & craft kits for children?
If you want to craft Christmas decorations with your child, you have many options to gather inspiration and creative ideas. You can find craft templates and instructions, for example in craft books – almost all libraries offer a themed shelf with Christmas books in the pre-Christmas season that you can browse together with your children for craft ideas.
But there are also wonderful DIY ideas for Christmas to try out, for example on craft websites. At HABA you'll also find nice Christmas craft kits that provide you with all the necessary templates so that you can get started with your children right away.
Ideas and craft instructions for individual Christmas decorations
Whether colorful garlands, funny reindeer made of paper, creative Advent wreaths to set the mood for the big Christmas celebration or classic snowmen symbolic of the cozy winter time - we show you popular craft ideas and instructions that are just waiting to be carried out by you during the Christmas season.
Festive moose garland for home or Christmas tree
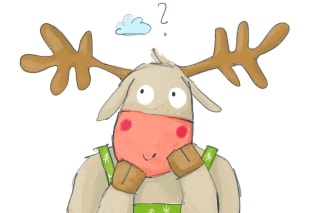
Garlands are great for decorating walls or the Christmas tree at Christmas time - whether in the living room, dining room or entrance area. For a festive garland, various Christmas motifs are suitable, for example cute moose -- like our Elo Moose!
You will need for crafting:
Gray cardboard
Scissors & glue
several layers of craft felt
Embroidery thread & needle
Twine for hanging
How to:
First you need a moose template that you can use for the garland. Either draw a moose yourself, trace our Elo moose, or look online for a suitable craft template that your children like. Draw the moose shape on the gray cardboard and cut it out.
Now transfer the moose shape 8 to 12 times onto the felt fabric. It's best to use a black marker for this.
Carefully cut out the felt moose. Help young children with crafting and cutting.
You can either embroider the mouth and eyes with contrasting embroidery thread or glue on small felt pieces. Small buttons also work well for the eyes.
Thread a long piece of twine onto the embroidery needle. Now carefully pierce each moose and thread the cute animals onto the string one after another. If you tie a knot just behind each hole, the moose will stay exactly in place and the spacing will be even.
Small Advent wreath 'to go'

At Christmas time, every home has an Advent wreath. That's not only a beautiful Christmas decoration, but - besides the Christmas tree - also a wonderful tradition for children: On each Advent Sunday a new candle is lit until finally it's Christmas! If your children would like to make their own 'Advent wreath' to take with them, we also have a simple DIY for you here.
You will need for crafting:
an empty matchbox
Construction paper
4 small birthday cake candles with candle holders
Scissors & glue
How to:
Stick colorful construction paper on the top and three sides of the matchbox, for example in Christmas green. Leave only one of the side tear strips free. Your child can now further decorate and color the box creatively.
Carefully drill four small holes in the corners on the top - it's best to help your children with this crafting step.
Place the small candles and candle holders together with a few matches in the box.
The Advent wreath 'to go' can now be taken along easily and set up in no time. On each Advent Sunday your children can take a candle from the box, place it in one of the holes and light it.
How beautifully it glows: craft a colorful Christmas town
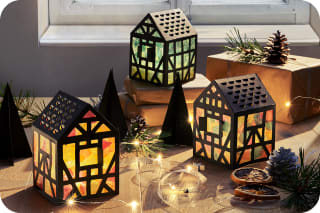
Candles and window lights must not be missing at Christmas – after all, they provide the warm, festive lighting for advent tea and for gift-giving. Especially beautiful are the small houses lit from the inside with windows made of colorful translucent paper. When designing a Christmas town, there are no limits for you and your children: craft classic square houses or experiment with oriental houses and towers like in 1001 Nights.
You will need for crafting:
Cardstock
Translucent paper in various colors
Scissors & craft glue
LED tealights
How to:
First you need the houses for your little glowing town. These are made from the cardstock. Either search together with your children for a suitable craft template online or draw the houses yourself on the paper. Consider all sides as well as the roof of the house and plan the fold lines so that the house can be folded together easily later.
If your children have found or created a template, transfer it to your cardstock. Either make many colorful little houses or use, for example, only black cardstock – this way the colorful translucent paper will stand out later. You can indicate the dashed fold lines with a pencil.
Cut out windows and doors and cover the resulting openings with translucent paper.
Fold the cardstock templates so that small buildings are formed. Make sure that the glue sides of the doors and windows are on the inside.
Once your Christmas decorations are assembled and glued, your children can decorate the houses as they like, for example with little stars or glitter dust.
In the end place an LED tealight into each house from above and place the little town on the windowsill – the magical light spectacle is ready to be admired!
No snow needed: craft a snowman with children

The snowman is a popular Christmas motif with children and, with its smile and carrot nose, makes them even more excited for Christmas. And if there's no snow to build a real snowman, you can easily make one with children – a Christmas decoration that definitely won't melt away.
You will need for crafting:
colored cardstock
colorful pipe cleaners
felt-tip pens
Scissors & glue
white paper plates in two sizes
How to:
Take a small and a large paper plate and attach them to each other by overlapping and gluing the edges. This gives you the body of the snowman.
Have your children shape the arms of the frosty friend from the two pipe cleaners and attach them to the right and left under the rim of the larger plate (that is, the snowman body).
Draw a top hat and a scarf on colored cardstock to dress the snow figure warmly. Carefully cut out the shapes. Your child can also happily draw nice patterns on them with felt-tip pens.
Glue the top hat onto the rim of the small plate and the scarf onto the joining section between the two paper plates.
Finally your child can draw a face on the smaller plate and a few buttons on the lower plate for the snowman.
Frequently asked questions about crafting Christmas decorations
When should we start crafting Christmas decorations?
At what age are children allowed to largely design Christmas decorations themselves?
What alternatives are there to making Christmas decorations?
More articles about leisure & creativity


Image credits
Children's hands make a Christmas tree out of felt © Oksana_S – stock.adobe.com
Two girls paint with brushes on paper © New Africa – stock.adobe.com
A child's hand reaches for scissors and colored construction paper © thingamajiggs – stock.adobe.com
Handmade Christmas wreath DIY with branches, dried fruit, spices and decoration © www.push2hit.de – stock.adobe.com