Crafting Easter cards with children: inspiration, tips & exciting ideas
Easter bunnies, Easter eggs, chicks and lambs – these are the classic and probably most popular Easter motifs that everyone thinks of when it comes to Easter crafts. But for your Easter cards there are far more motifs, which you can create.
Because even motifs that you during a joint spring crafting created, are suitable for Easter greeting cards. So especially flowers, that bloom in spring, clouds or animal motifs like butterflies and ladybugs are very popular with your little crafters.
Let yourselves by nature and Easter customs be inspired. The choice of motifs as well as materials seems unlimited. Maybe you also create entirely your own creations, that hardly anyone else would have thought of. The more imagination, the better.
Because the shared crafting promotes fine motor skills and creativity as well as your children's concentration. Which Easter cards you want to make depends on the skills and interests of your children . So always let them help decide which craft projects to carry out with you for Easter and which tasks they'd like to take on.
This way you avoid possible overwhelm. Your children will beam with pride, when they hold the handmade Easter cards in their hands – fully aware that they will bring joy to their loved ones.
In general, shared enthusiasm and family time should be the focus. Enjoy it and get started right away with your Easter craft ideas.
Materials you'll need to craft Easter cards
To design the most beautiful Easter cards, you'll need, in addition to a large dose of anticipation, also the right materials. HABA has put together a list for you to use as a guide. You may already have some of the craft materials at home, so you can put your favorite Easter craft ideas into practice right away.
Paper, card, cardboard box
Yarn
Craft foam
colored construction paper or colored cardstock
transparent paper
Felt
Needle & thread
Decorative & embellishment materials
Craft glue/adhesive or paste
Pens & paints
Markers
Acrylic & watercolor paints
Finger paints
Paintbrushes
Craft scissors
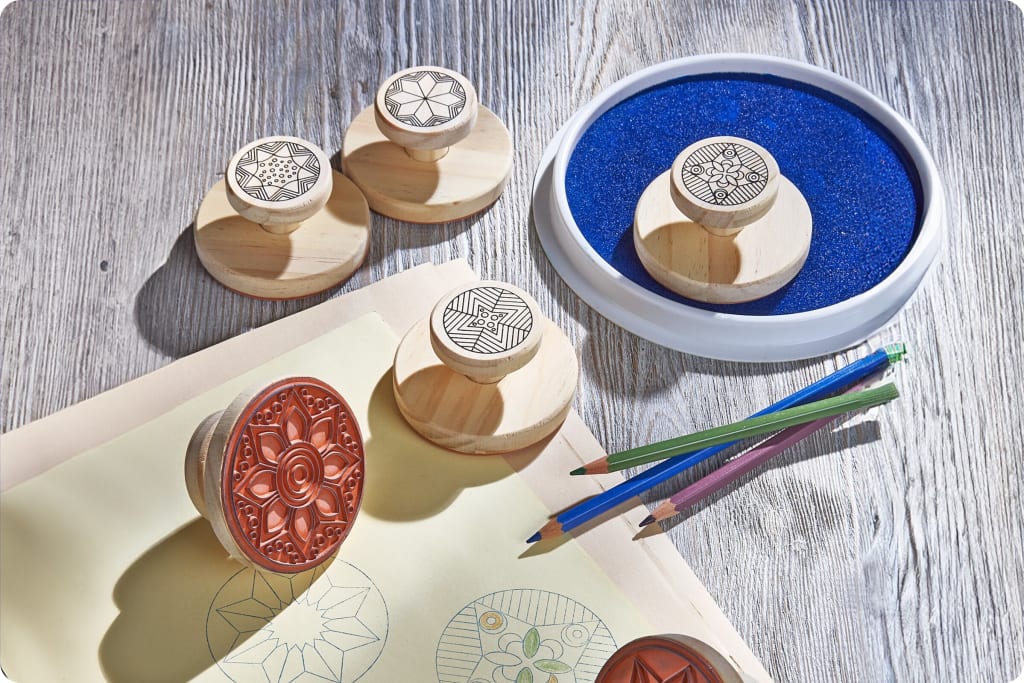
Easter stamp pad
DIY Easter cards: Simple craft instructions for all ages
You probably want to get started right away and your beautiful and personalized Easter cards make and with very personal greetings provided. So what are you waiting for? Grab your craft supplies and get creative. The following Easter card ideas and craft instructions are suitable for every age.
Make templates for beautiful Easter cards
Materials needed:
thicker cardstock, cardboard, or craft paperboard
tracing paper
pencil & eraser
craft scissors
Here's how:
First decide together on different motifs. The selection of motifs for Easter is varied. Whether Easter eggs, Easter bunnies, or rather spring motifs like flowers and your children's favorite animals: you have the choice which Easter motifs you'd like to make as templates. It is especially popular to Easter bunny cards to make, because they can be customized with cute details like pompom tails or funny googly eyes.
Now take some thicker cardstock, cardboard, or a craft board. The thickness determines how often you can use your templates. On your chosen paper, draw the motifs you decided on earlier. The size of your Easter eggs, bunnies & co. is entirely up to you, as it also depends on the size of your card. Tip: Your chosen motifs can also be drawn on tracing paper. This way they can be traced repeatedly and drawn directly onto the card. This is often even more fun for older children.
Then cut out the templates that you can use as stencils for your Easter cards.
Easter cards made from paper, cardboard or card stock
Materials needed:
Paper, cardboard or card stock in the colors of your choice
craft scissors
craft glue
craft templates
pens & paints
acrylic & watercolors
decorative & embellishment materials
Here's how:
First think about what shape you want to make your Easter card in. Should it be in the shape of an Easter egg, an Easter bunny body, or the familiar rectangular form? You decide what you prefer.
If you want a card in the shape of an Easter egg, you can use one of your own handmade templates or our free template to use. Place it on your cardboard or other material (again choose whatever you want to use) so that you can trace it. Important: Make sure that one side – roughly in the middle – has a straight edge so that you can open and fold the card well without it falling apart. Tip: If you want to make a rectangular shape, fold your paper in half to make a card so you can continue with step four.
Then cut out your Easter egg card.
Now for the details: draw dots, stripes, or other motifs like bunnies, chicks or flowers onto colored cardstock. Cut out your motifs and then glue them onto the Easter card. You can also add further details with pens and paints.
Once your Easter card is finished, all that's left are a few nice, personal words and Easter greetings for your loved ones.
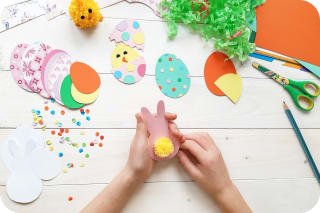
Design Easter cards with finger paints
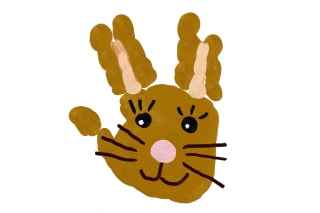
Handprint Easter bunny
Materials needed:
colored cardstock
blank paper
finger paints
small bowls for the paints
brushes
old newspaper
masking tape
painting smock or old clothes
pens & paints
Here's how:
Take a sheet of cardstock in the color of your choice and fold it in half to make a card. You can leave the card single-colored and press the handprint directly onto the front, or cut out a blank sheet and glue that with the handprint onto the front.
Now lay out old newspaper on your work surface. The paper or card onto which you want to print your finger paint designs for Easter should be lightly secured with some masking tape at the four corners on the newspaper. This way it won't slip.
Put the desired colors into slightly larger bowls so your children's hands fit well.
Now it's your kids' turn with their handprints: they can dip their palm directly into the finger paint. Tip: For toddlers, it makes sense to apply the finger paint with a brush if they want to create specific motifs on the paper.
Then shape your children's fingers. They should spread their fingers apart. The index and middle fingers are pressed together, as are the ring finger and little finger. Then you can press the hand onto the paper so you see a bunny shape in front of you. Tip: If that's still too difficult for your children, you can also paint only the index and middle fingers and then press a second pair of ears onto the handprint afterwards.
Let your children dip their fingers into the finger paint to paint a face on their Easter bunny. For additional details you can also use the fingerprint technique to create small flowers or Easter eggs around the bunny.
Finally, after your Easter card is completely dry, all you need to do is add Easter greetings. And you're done with your cute DIY bunny cards for Easter.
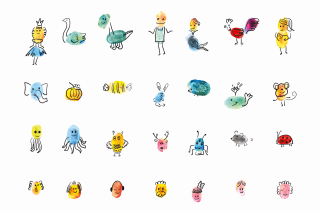
Finger paint animals
Materials needed:
colored cardstock
blank paper
finger paints
small bowls for the paints
brushes
old newspaper
masking tape
painting smock or old clothes
pens & paints
Here's how:
First fold your paper in half to make a card. Tip: Blank paper is best. That way your little finger paint animals really stand out.
Cover your work surface with old newspaper and secure your card on it with some masking tape. This way it won't slip.
Put the finger paints you want to use into small bowls that your children can eagerly dip their hands into.
Next it's finally your little artists' turn – without parental assistance: let them dip their fingers into the finger paint.
Since you want to create little animals, press only the fingertip onto your Easter card. Once you've made several small fingerprints, wait for them to dry. In the meantime, clean the little fingers with some water and soap.
With pens (preferably fineliners) you now draw the individual legs, faces, bunny ears, combs or other small details that turn your fingerprints into real bunnies, chicks & co. Which animals you want to create is entirely up to you.
Finally, all you need to do is add nice and heartfelt Easter greetings to your finished handmade Easter card for your loved ones.
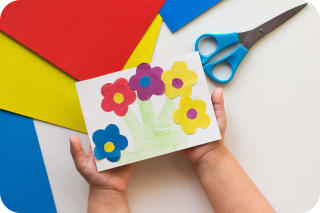
Easter cards with floral motifs
Materials needed:
colored cardstock
paper, cardboard, card stock
felt
needle & thread
craft templates
craft scissors
craft glue
pens & paints
decorative & embellishment materials
Here's how:
First take colored cardboard, paper, or card stock and fold it in half to make a card.
Now it's straight to the flowers you want to make for your Easter card. You can use various materials for this. Whether felt, colorful thinner cardstock, or even different fabrics like wool – anything is possible. Your creativity knows no bounds. Draw your flowers beforehand or use craft templates to trace them onto your paper, felt & co.
Then carefully cut out the flowers.
Then place them on your card as you like. Glue the flowers firmly (you can also attach felt flowers with needle and thread) and, if you like, paint on small details.
Once you've finished crafting the Easter card, all that's left are a few personal words for your loved ones.
Paint flowers: Beautiful template for crafting
Discover our simple coloring template, to color spring-like flowers for your Easter card. This creates colorful and personal Easter greetings in no time!
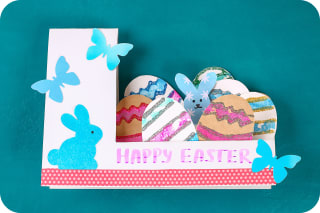
Pop-up Easter cards
Materials needed:
cardstock, cardboard or card stock
pens & paints
glitter pens
felt
craft glue
craft scissors
Here's how:
Take a card stock or paper in the color of your choice and fold it in half to make a card. Then place it portrait-style with the fold on the left in front of you.
In the next step, draw with a pencil a rectangle in the top right of the Easter card. From the rectangle there should be about four centimeters to the right card edge and about six centimeters to the bottom edge. Then cut out the rectangle.
Now it's time for the contents of the card. Draw many eggs and other motifs like bunnies, eggs or butterflies on colored cardstock and cut everything out. Design your pop-up motifs and other details as you like.
To give your card that nice 3D effect, cut a strip from any cardstock. The strip should be slightly larger than the opening of your card when you open it and stand it horizontally.
Then fold the strip like an accordion. Now you can glue your individual motifs onto separate sections of your folded strip. Offset the motifs from each other so that they give the impression of getting larger towards the back. The ends of your strip should remain free by at least one centimeter.
Apply glue to the ends of your now-decorated paper strip and press it inside onto the front and back of your Easter card.
On the front of your pop-up Easter card, also glue a few small bunnies, chicks or other cute animal and plant motifs suitable for Easter. You can also leave a few nice words full of love on the front.
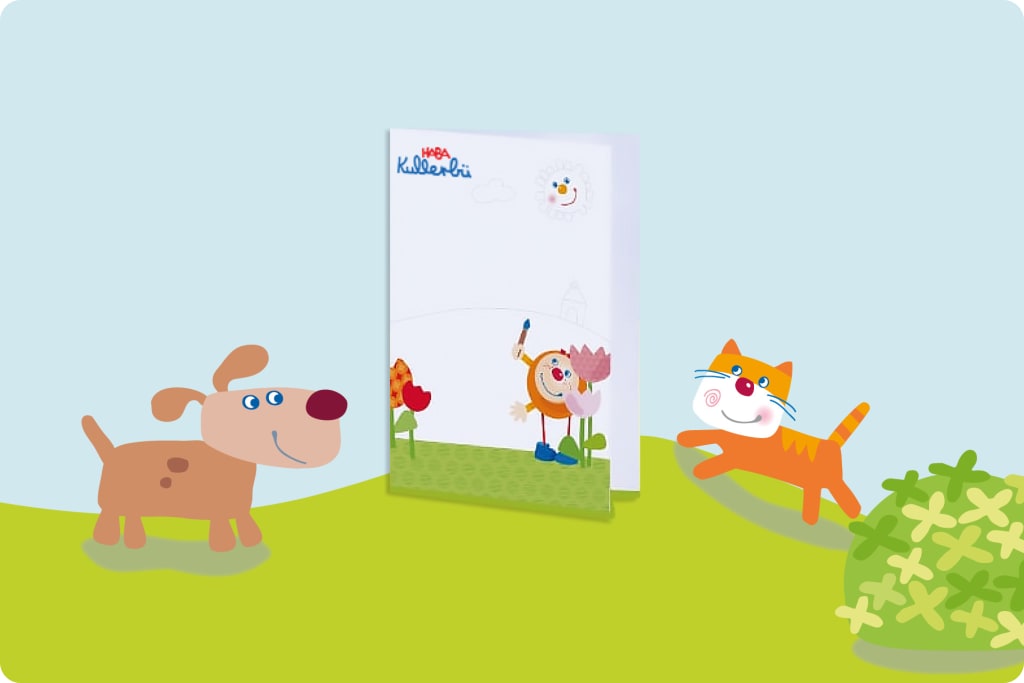
Kullerbü Easter Card
You need:
craft mat
printed templates
scissors
colored pencils
glue
Tips for parents: This craft idea is suitable for children of all ages. For the little ones, you can cut out the flowers and faces; older children can help partially or cut everything out by themselves.
How it works:
First, together with your parents, download the template for the Easter card as well as for the flowers and faces of the Kullerkerle and print them out. Place the sheet with the flowers and Kullerkerle on the craft mat, take your colored pencils and color the funny faces.
Now cut out the faces of the Kullerkerle one after another and place them on one side of the craft mat. When cutting out the flowers, it's best to have your parents help you.
Now take the Easter card. If you want, you can first color the background, the sun and the clouds. Then take the glue and stick the faces and flowers on the outside or inside of the card.
If you like, you can also write "Happy Easter" or a short message on or inside the card. Of course, you can also have your parents help you here. Now you're finished and have a great handmade gift for Easter!
Discover all Easter craft kits in the shop
Frequently asked questions about crafting Easter cards with children
When should we start making Easter cards?
What alternatives are there to making Easter cards?
Which Easter cards can toddlers already make on their own?
More Easter inspiration in our magazine


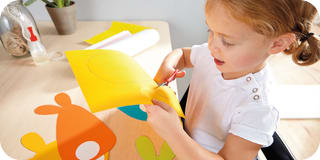


Image credits
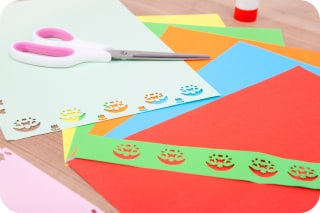
white scissors lying on white die-cut paper © pfluegler photo - stock.adobe.com
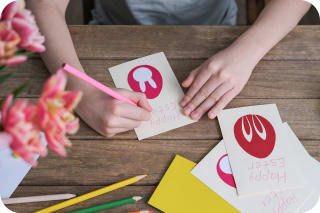
handmade Easter card with Happy Easter © Elen Nika - stock.adobe.com
brown handprint painted as an Easter bunny © Liddy Hansdottir - stock.adobe.com
hand-painted fingerprints © Rasveta - stock.adobe.com
handmade card with paper flowers © Tatiana Foxy - stock.adobe.com
folded card with Happy Easter © detry26 - stock.adobe.com