Crafting spring flowers: ideas & tips for shared crafting sessions
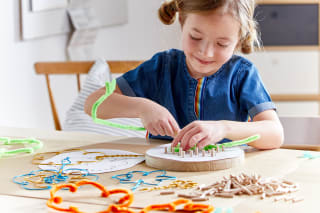
Tulips, carnations and pansies – they are all popular spring flowers that make great motifs for crafting flowers together with your children. During walks in the fresh air be inspired by nature.
Generally: Always choose your craft ideas & instructions according to your child's interests and age. That way you avoid overwhelming them or making them lose the fun of crafting together.
Flower motifs are especially popular with little hobby artists. After all, children still discover so much about the big wide world out there. When crafting, in addition to the joy of learning, creativity and are promoted. Both are extremely important for the child development.
Handcrafted flowers, however, are not only visually impressive. They are perfect as gifts for Mother's Day or for other special occasions like birthdays. The best part: paper flowers or other artworks do not wilt and last incredibly long. But the most important thing is that they from the heart come.
These materials are suitable for making flowers with children
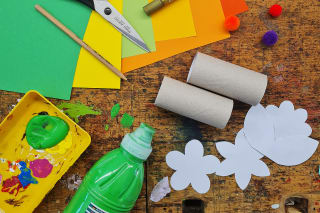
For crafting flowers there are many different materials, which you can use. HABA has compiled a list that gives you a good overview. Maybe you already have some of these at home and can start crafting right away.
corrugated cardboard or cardboard boxes
colored construction paper
transparent paper
crepe paper
plain paper in the size of your choice
plastic bottles
colorful muffin cups in various sizes
felt
needle & thread
pens & paints
finger paints
acrylic & watercolor paints
paintbrushes
pearl markers & glitter pens
craft scissors
craft glue/adhesive or paste
painting smocks & aprons
old newspaper
jars in the size of your choice
floral wire
wooden sticks
pipe cleaners
Crafting instructions & templates - how to craft your own flowers
Now you probably want to get started right away and make a very big bouquet of flowers to craft, right? So let's get going, grab your craft supplies and let your creativity run wild. The following seven craft ideas and instructions are suitable for children of all ages and are definitely also great gifts for different occasions.
Painting flowers: beautiful template for crafting
Craft paper flowers
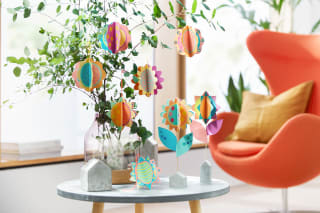
Materials needed:
colored construction paper
green pipe cleaners
ruler
pencil
craft scissors
craft glue
Here's how:
Choose construction paper in the colors of your choice and cut it into 7.5 x 7.5 centimeter squares.
Now take two squares of different colors and fold them into triangles. To do this, place one corner onto the opposite corner.
Once you've finished making the triangles, continue. Open the triangles and cut them along the diagonal with the scissors. From two triangles you've now created four (two of each color).
Then place two triangles — one of each color — on top of each other.
Fold the right corner up a little so that a kind of blossom forms. Do the same on the left side.
Repeat the process with the other two triangles as well.
When you're done folding, you'll have two paper flowers in front of you. Turn one of them over now. Glue the end of a green pipe cleaner to the back. Then take the other flower and glue it on top as well. The two flowers should be placed as closely aligned as possible.
And your paper flower is finished, shining in colorful hues from both sides!
Craft wooden flowers
Materials needed:
Sachenmacher wooden flower set by HABA
Acrylic & watercolor paints
pens
finger paints
pearl markers & glitter paint
Here's how:
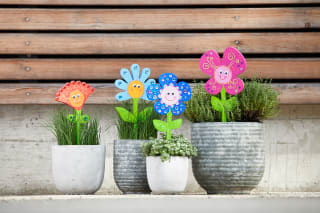
Lay the four wooden flowers from the HABA craft set in front of you. The flowers come in different designs.
Your children can paint them as they like — whether with acrylic and watercolor paints or colored pencils. It's completely up to you.
Once the flowers are dry, they can also be embellished with pearl markers or glitter pens.
Finally, your beautiful wooden flowers get their googly eyes so they can sparkle along with you.
And your unique wooden flowers are finished!
Craft cardboard flowers
Materials needed:
colorful corrugated cardboard
pencil & eraser
pens & paints
craft scissors
craft glue
jars in the size of your choice
Here's how:
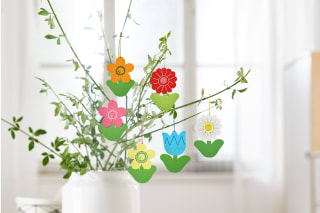
Take a jar in the size of your choice and place it opening-down on the corrugated cardboard in the color you want to use for your flower.
Trace the outline of the jar with a pencil. In total, you should end up with five equally sized circles. These are your petals.
Create another circle from yellow corrugated cardboard. The circle is the flower center. But there are no rules here either. Choose the colors however you like.
Then cut out all the circles. Glue the petals together in an overlapping way so that the shape of a flower forms.
Finally, glue the flower center on top.
And your cardboard flower is finished!
Make felt flowers
Materials needed:
Sachenmacher felt peg flower set from HABA
Craft glue
Bead maker
Beads or other decorative gems
How to:
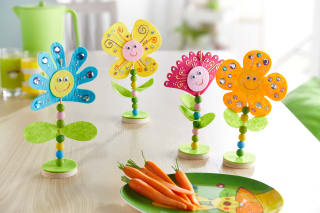
First, take a large felt disc from the craft set and place it on one of the wooden discs.
Now insert a dowel into the center and alternately thread wooden beads and leaves onto it so the flower stem shines in colorful hues.
Now it's the bloom's turn. Glue on a face and googly eyes, then push it onto the dowel.
If you like, decorate the flower afterwards with bead markers or other decorative materials.
Repeat the whole process until you have four beautiful, individually decorated felt flowers.
You're done making your felt flowers!
Make crepe paper flowers
Materials needed:
Crepe paper in the colors of your choice
Floral wire
Craft scissors
Craft glue (liquid)
Thin wooden stick
How to:
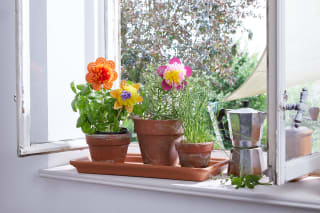
First cut a 4,5 x 5 centimeter strip from the crepe paper roll in the color of your choice. Another eight pieces should be 4,5 x 10 centimeter. Then you also need ten pieces measuring 4,5 x 3 centimeters for crafting.
For your petals, fold all the crepe paper pieces slightly in half. Then cut the top and bottom a bit into shape so they look like real petals. Then unfold them again.
Tip: Stack all pieces of the same size. That way you can fold them all at once and cut them to the same shape. Of course only if you'd like. Your children can also make each flower individually.
Now the wooden stick comes into play. Wrap your individual petals around the top end of the wooden stick. This is only to shape your petals.
Cut another piece from the crepe paper roll and glue it, pressed together, onto a floral wire. This forms the inside of your flower.
Now glue on the large petals. To do this, coat their lower edge with a little liquid craft glue. Then press them lightly onto the center of the flower on the floral wire. Do this until you have assembled all the petals into one large flower.
Tip: Stagger the petals. This makes your crepe paper flowers look even more realistic.
You're done folding your crepe paper flower!
Paint flower pictures with finger paints
Materials needed:
Blank paper in the size of your choice
Colorful construction paper
Finger paints
Watercolor paints in the colors of your choice
Markers or pens
Small bowls for the paint
Brushes
Craft scissors
Old newspaper
Crepe tape
Painting smock or old clothes
How to:
Prepare your workspace for crafting: spread out newspaper. That way paint splatters won't have a chance to drip onto your work surface or other surfaces.
Fill small bowls with the colors you want to use and mix them if necessary.
Now take a blank sheet of paper in the size of your choice. Use a bit of crepe tape to secure it at the four corners onto the newspaper. This ensures your paper won't shift while you paint the flowers.
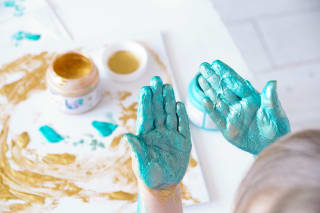
Now your kids can eagerly dive into the bowls of paint. They can paint flowers with their fingers or even use their whole palm. For example, paint green on your child's palm and then press the hand onto the paper. This creates flower stems that can then be decorated with beautiful blooms. Fingers come into play again for that. Maybe it will even be a colorful mix of everything — you decide!
When your flowers are finished, let them dry well. Afterwards you can draw funny faces on the flowers with pens. This is optional.
Now just wash your hands with lukewarm water and some soap and throw your dirty clothes or painting smocks in the wash. There's surely a nice spot where you can hang and admire your flower pictures.
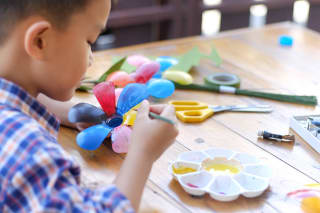
Make flowers from plastic bottles
Materials needed:
Empty and rinsed plastic bottles
Craft scissors
Lighter
Craft glue
Acrylic paints
Brushes
Wooden or metal rod
How to:
IMPORTANT:The first three steps of this craft idea are best done by you parents: Take an empty, rinsed plastic bottle and cut off the bottom. The cut edge should be just above the inward-facing ridges.
Trim the bottle bottom along the inner ridges so that the petals of your plastic flower are formed. Make sure there are no sharp edges left at the end.
Now your plastic flower takes its true shape. To do this, take a lighter and hold it at some distance to the trimmed bottle bottom. Heat the plastic bottle only briefly so the petals slightly deform and don't burn. The heat melts the plastic and the flower gains a "more realistic" shape.
Once you've shaped the flower, your children are up next: they can paint it to their heart's content with acrylic paints of your choice.
When you're done painting, let your plastic flower dry well. Only then attach it with glue to a wooden or metal rod. You can also attach the flower to a cord to hang it up afterwards.
And your plastic bottle flower is finished.
Frequently asked questions about crafting flowers with children
Which flowers bloom in spring?
Which real flowers are suitable for crafting?
What alternatives are there to crafting flowers with children?



Image credits
Boy painting a flower made from plastic bottles with a paintbrush © Wutthichai - stock.adobe.com