Making instruments: How does it work?
Resonators:
Your instrument needs something in which the sound can develop. Empty cans, cardboard rolls, old metal watering cans or cups and buckets make wonderful resonators for homemade instruments.
Get creative:
An old piece of thread can become a guitar string, small pebbles are perfect in a rattle. Go exploring with your child—you'll be surprised which objects can be turned into an instrument.
Provide help:
If your child has made the instrument themselves, it's even more fun to play with. However, you should help with most instruments when it comes to drilling holes or making precise cuts with a craft knife.
Fun:
It really doesn't matter how the sound from your instrument turns out. Homemade instruments rarely sound like 'real' violins, drums, or guitars. That's why they're often described as 'noisemakers'. The main thing is that you and your child have fun while making them and then while playing.
Which instruments can I make with my child?
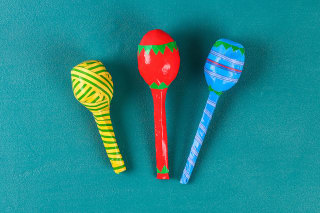
Drum mallet
You'll need:
Wooden dowel
Newspaper
Scraps of fabric or old socks
String
Drill
Zig-zag scissors
How to make it:
Drill a small hole about 6-8 cm from the top end of the dowel.
Above the hole, crumple the newspaper around the dowel.
Then cut the fabric or sock scrap and wrap it below the newspaper with the string. Thread the string through the hole in the dowel several times so it doesn't slip when drumming.
Then cut the fabric scraps with zig-zag scissors so the fabric doesn't fray as easily.
Finally, the dowels can be decorated with bright colors.
Hand drum
You'll need:
Empty tin can
Colored tape
White poster paint
Balloon
Colored paper or paint for decoration
How it works:
Make sure the can doesn't have a sharp edge after opening to avoid injuries. If necessary, briefly smooth the edge with fine sandpaper.
Wash the can, dry it and prime it with white poster paint.
Inflate the balloon slightly, cut off the neck of the balloon, stretch the remaining part with both hands and pull it over the opening of the metal can.
Secure the balloon with tape so it doesn't slip.
Now all that's left is the decoration and your child can play their hand drum. Hold the can in one hand and play near the outer edge with the fingers of the other hand.
Rainmaker
You'll need:
Empty stackable chip can with lid
Chicken wire
Small pebbles or uncooked peas/lentils/rice
Parchment paper
Rubber bands
Pliers
Construction paper, paint, pens, feathers, etc. for decorating
How to make it:
Cover the outside of the can with construction paper. If you want to draw a pattern on the paper, it's easier to do that before gluing.
Use pliers to cut the chicken wire to the size of the chip can, roll it up and then place it inside the can.
Depending on which filling you chose, add stones, lentils or rice to the can. Make sure you don't put in too much or too little. If you're not sure, you can close the can in between and test the sound.
When you've found the right amount of filling, close the can with the lid. Then the lid and bottom can be covered with cut pieces of parchment paper. These are held in place on the can by the rubber bands.
Finally, the can can be decorated as you like. Feathers, ribbons or cut-out construction paper shapes — there's no limit to your creativity.
The rainmaker now sounds especially nice when your child slowly moves it back and forth and listens to the 'raindrops'.
More articles about leisure & creativity








Image credits:
individual cardboard parts for a guitar © Pixel-Shot - stock.adobe.com
homemade hand rattle © Detry26 - stock.adobe.com