What can children make from pine cones?
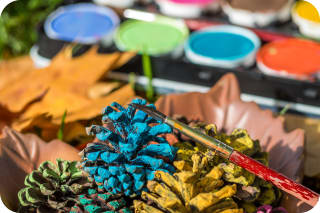
Pine cones are not only beautiful to look at; with their pleasant scent they radiate pure autumn joy and are ideal for crafting beautiful, seasonal decorations for your home. On the next Forest walk with your children it's worth taking a close look at the ground, because here you'll find crafting materials in abundance. Pick out the most beautiful or funniest pine cones – various decoration and DIY ideas can be found right below on this page.
Directly to the crafting instructions
Autumn crafting with pine cones
When autumn crafting are used various natural materials in use, which you can collect together with your children and process further as you like. Pine cones, along with chestnuts, are among the most popular finds. With just a little equipment and supplies you can craft beautiful decorative objects from the cones for walls, windowsills, doors and tables. How about, for example, a pretty autumn wreath for the front door? Also pine cone ornaments are quick to make and the eye-catcher of your atmospheric autumn window.
Christmas crafts with pine cones
Pine cones are popular crafting materials not only in autumn, also in the pre-Christmas season many craft ideas can be realized with the distinctive cones. In the Christmas crafts with children the pine cone is therefore very popular and offers you many creative possibilities for a festive winter decorations. At Christmas, the Christ Child and Saint Nicholas of course must not be missing: With a little fabric, cotton wool and glue you can make little figures from the pine cones that you can hang on the Christmas tree hang or in the Advent wreath place.
Pinecones for crafting – where to find them

Whether in your own garden, in the park or on the forest floor – in autumn and winter you'll find pinecones everywhere that you can use for crafting. When the leaves slowly fall from the trees in autumn, it's also the best time to collect pinecones.
No cone is like another. Classic pinecones stand upright on the branches and are about 10-16 cm long. This type of cone never falls whole from the trees – the cones you find on the ground for crafting usually do not belong to the fir, but to other conifer species that we'll briefly introduce to you.
larch cones are egg-shaped and light brown. The protruding scales of the 2-6 cm long cones offer an ideal shape to implement various DIY ideas and create beautiful objects.
spruce cones are cylindrical and range from 10-18 cm in size. Because of the smooth scales, spruce cones are ideal for making small figures or decorative charms.
You will particularly often find various pine cones in the forest. The cones of the Scots pine are dark brown to black and very firm. Due to their structure and appearance they are excellent for a variety of crafts such as wreaths, figures or painting, because their scales open very wide when ripe. The cones of the black pine have more horizontal scales and a conical shape. But this type of pinecone is also popular for many crafting ideas and is easy to work with.
Materials you need for pinecone crafting
If you've already diligently collected pinecones for crafting, you can get started. Below you'll find a small list of materials, which you need to create various crafts.
different types of pinecones
glue or hot glue
paints
brushes
googly eyes
styrofoam or wooden balls
yarn and wool
wire
feathers
felt and fabric scraps
scissors
pens
cardboard
pom-poms
Natural materials like acorns, chestnuts, leaves, etc.
Pens and paints
To make your pinecones shine in the most beautiful colors, you'll need suitable pens and paints.
craft glue and adhesive
Securely glued – that way nothing will wobble anymore. When crafting with pinecones you need a good glue to firmly and permanently attach fabric scraps, felt or other materials.
Five lovely pine cone craft ideas – crafting instructions
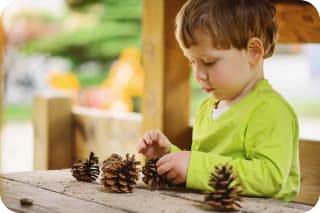
During fun autumn games and during extensive autumn crafting with natural materials, children experience the season with all their senses and can get into what is likely the coziest time of the year with you.
Depending on age and skills of your children there are many different craft ideas you can do together. We've gathered some of the loveliest DIY ideas for you here.
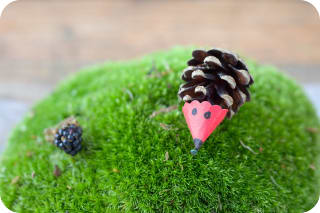
Funny pine cone hedgehog
Required materials
pine cones
(red) cardboard
black marker
glue
scissors
googly eyes
Step-by-step instructions
Take the pine cone and clean off any coarse dirt. A cone with widely opened scales that resemble a hedgehog's spines works best.
Cut a red circle out of the cardboard. If you're unsure about the shape, use a compass or another round object as a template and draw the shape onto the cardboard. Cut it out with the scissors.
Now make a small cut on one side up to the middle so you can fold the cardboard into a cone. Apply glue to the overlapping inner side of the cardboard and glue the hedgehog's face together. Let it dry for a moment until the snout holds well. If you like, cut the edge into a zigzag or rounded shape.
Cover the tip of the pine cone with a generous amount of glue and place the cardboard cone on it. Wait a short moment until the hedgehog face is set.
Almost done! Use the pen to draw the hedgehog's eyes and nose. Alternatively, you can glue on googly eyes – that makes the little hedgehog even funnier.
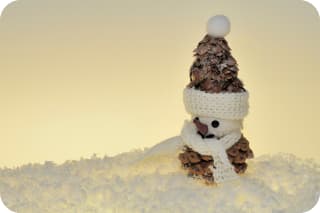
Pine cone snowman craft
Required materials:
two pine cones (one large and one small cone)
styrofoam ball
felt-tip pens (black and orange)
felt, fabric scraps or yarn
glue or hot glue
pom-pom
Step-by-step instructions
Place the two cleaned pine cones on the table in front of you. Spread adhesive on one side of the styrofoam ball and press it onto the tip of the large pine cone. It will later be the snowman's head. Tip: hot glue holds it even better.
Once the head is securely attached and the glue has dried, also spread glue on the top side of the styrofoam ball and press the second, smaller pine cone onto the head – this will later be the snowman's hat. Let it dry for a while. Give the snowman two eyes, a mouth and a funny carrot nose with the felt-tip pens.
Decorate your snowman as you like with the fabric scraps – a warm scarf keeps the little fellow nice and warm. If you like, you can also knit a small scarf to put around the snowman's neck later.
Now only a cool pompom for the hat is missing. Glue a small pom-pom onto the tip of the upper pine cone – and your personal frosty friend is ready.
Autumn wreath made of pine cones
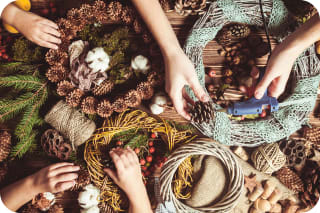
Required materials:
many pine cones in various sizes and shapes
wreath form with foam base
various natural materials for decorating such as chestnuts, moss, acorns, etc.
wire for attaching
glue or hot glue
Step-by-step instructions
Choose a wreath form made of foam – this is the base of your autumn wreath. Clean all natural materials.
Wrap wire around the various pine cones and the other materials so you can push them into the foam. Arrange your wreath as you like and place the materials as desired. You can also simply attach smaller natural materials with hot glue.
If the wreath is to decorate the door later, attach a loop of wire to the back for hanging. For a table wreath you do not need a hanger.
Suet balls from pine cones
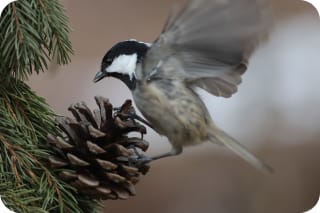
Required materials:
several large pine cones with opened scales
250 g organic coconut oil
250 g organic muesli mix without sugar or homemade seed mix
made from oats, nuts, raisins, cereal grains and sunflower seeds
200 g whole grain flour
string
scissors
saucepan
wooden spoon
Step-by-step instructions
Put the coconut oil into a saucepan and let it melt slowly—stirring constantly. Make sure the oil does not get too hot.
When the oil is liquid, turn off the heat, sprinkle the seed mixture into the pot and stir the mixture well.
To form a firm mass, gradually add the flour while stirring constantly.
Let the mixture cool a bit. Now it's time to fill the pine cones for your garden. Hold the cones upright over the pot and coat them with the spoon. Make sure all the scales are well filled.
Now the pine cones go into the refrigerator for a few hours so the mixture hardens. Once the cones are firm, the feast for tits and other birds is ready. Take strong twine and tie the suet-ball pine cones to the trees in your garden and enjoy the animal visitors that drop by.
Clever pine cone owl
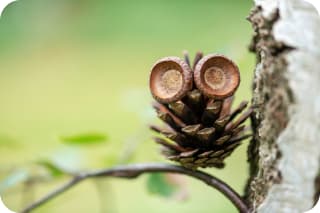
Required materials:
pine cones
two acorn caps
glue
googly eyes or a pen
Step-by-step instructions
Choose a nice pine cone that will later become the owl's body and clean it of coarse dirt.
Two acorn caps serve as eyes. With a few drops of glue or hot glue they can be quickly attached to the cone.
If you like, paint the eyes with a pen or stick funny googly eyes into the caps — and the clever owl is ready and can be placed on the windowsill.
Frequently asked questions about crafting with pine cones
What can you make with pine cones?
Which tree produces the best pine cones for crafting?
What do you need to craft with pine cones?
Read more articles from this topic










Image credits
Pinecone owls © ISO101 - stock.adobe.com
Painted pinecones © Animaflora PicsStock - stock.adobe.com
Boy with blue pants plays with pinecones under a tree © eloi - stock.adobe.com
Boy with green long-sleeve shirt plays with pinecones at the table © Igor Link - stock.adobe.com
Crafting hedgehogs from cones © rainbow33 - stock.adobe.com
Pinecone little man © unikat - stock.adobe.com
Making a natural wreath © oksix - stock.adobe.com
Great tit taking off from a pine branch on a blurred brown background © chermit - stock.adobe.com
Pinecone as an owl © Claudia Paulussen - stock.adobe.com