Required materials
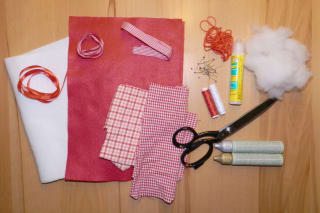
red and white craft felt
checked fabric scraps
craft glue (should be suitable for fabrics) or fabric glue
red and white thread
red and checked fabric ribbons
polyfill stuffing
pins, sewing needle or sewing machine
craft scissors (for cutting threads and ribbons), craft mat, pen, ruler, clothespins or craft clips
for decorating: fabric paints in gold and silver (only necessary if you want to decorate the boots)
for parents:
fabric scissors
tips for parents
This craft idea is suitable for all children and easy to carry out with a little help. Idea 1 is suitable for younger ones because the felt boots are glued together. The fabric boots are sewn either with the sewing machine or by hand (Idea 2). Help your children cut out the boots. You should use fabric scissors, because only these cut clean edges. However, they are often a bit unwieldy, so we recommend that you cut the boots and the boot cuff for your children.
Crafting instructions
First you need to, with the help of your parents, download the template for the St. Nicholas/Santa boot, print it out and cut it out.
Idea 1: Make felt boots (for younger children)
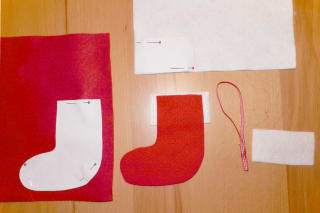
Pin the boot pattern onto the red felt. The pattern for the cuff goes on the white felt. Ask your parents to cut each of those out twice. Then you can prepare the ribbon for the loop: cut off 10 to 20 cm, depending on how long you want the loop to be. In the photos the finished loop is about 10 cm long.
First glue the two red boot pieces together. This gives the felt boot more stability and it looks better.
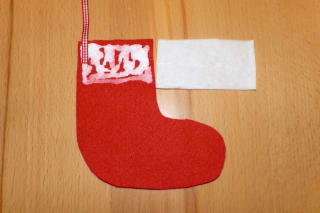
Then apply glue to the top edge of the boot – only on the area of the cuff. Then place one end of the ribbon onto the glue at the back edge of the boot. Then press the white cuff onto it.
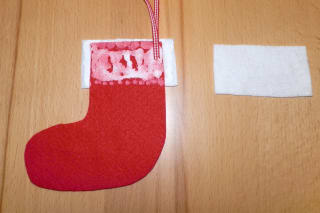
Turn the felt boot over and apply glue again to the top edge of the boot. Now also put glue on the protruding edges of the cuff. Then place the second end of the ribbon onto the glue at the back edge of the boot. Then press the white cuff onto it.
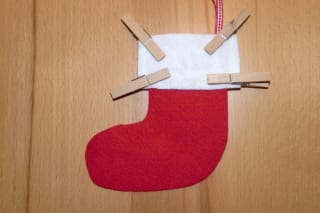
Secure the corners of the felt boot for drying with clips (or pins).
Idea 2: Make fabric boots (for older children)
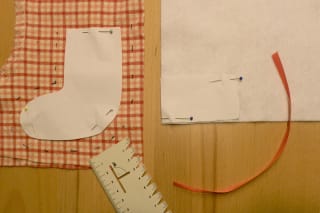
Pin the boot pattern onto the red felt. The pattern for the cuff goes on the white felt. Ask your parents to cut both out twice. Then you can prepare the ribbon for the loop: cut off 10 to 20 cm, depending on how long you want the loop to be. In the photos the finished loop is about 10 cm long.\r\n\r\nFirst glue the two red boot pieces together. This gives the felt boot more stability and it looks better.
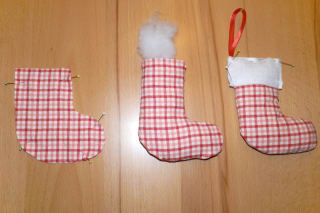
Now sew the two fabric boot pieces together with a 1 cm seam allowance. If the fabric has a right side (the pattern is clearly visible), place that side inside. So you will be sewing on the wrong side. You can sew either with the sewing machine or with small hand stitches. For this boot size it takes 30 to 60 minutes, depending on how quickly you can already sew.
Turn the finished boot the right way out and stuff it with some polyfill. Then place the white pieces for the cuff on the top edge, right and left, and pin them in place. Then put both ends of the ribbon into the cuff and secure it with its own pin.
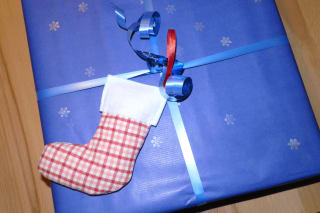
The cuff is sewn close to the edge. Make sure that the loop is properly sewn in. And the fabric boot is done … and can be hung on a gift.
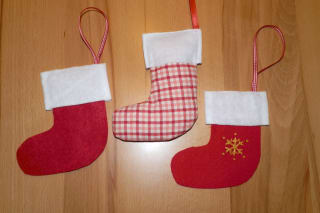
If you like, decorate the boots with fabric paints: snowflakes, stars or dots look nice.